How to Make Pretty Labels with Canva
Learn how to make pretty labels with Canva! It’s quick, easy, and free! This helpful video tutorial will walk you through it step by step!
I love, love, LOVE to label when I’m organizing various areas of our house! I’ve made labels with my Cricut machine, a Silhouette, in Microsoft Word, with a label maker, and more.
But while I love all of those methods, there is yet another super quick and easy way to do it too… and it’s free! And since we tend to get into “label all the things” mode near the beginning of the year, I couldn’t keep this oh-so-easy tip to myself anymore.
My Favorite Labeling Supplies
Before we jump into the tutorial, here are the supplies you’ll need to create your pretty labels…
Labeling Supplies
This post contains affiliate links. For more information, see my disclosures here.
How to Make Labels in Canva
Canva.com is a free tool that I’ve been using to make simple graphics for a while, so I thought I’d do a quick tutorial to show you how to make cute little labels with Canva in just a few minutes.
If you’re a video person, you can catch the easy walkthrough here…
…or if you’d rather see words + screenshots, keep reading!
Step 1- Create your document in Canva.
Head over to canva.com. If you don’t have one yet, go ahead and sign up for a free account. You can choose to upgrade for access to more fonts, graphics, and features, but you will be able to do plenty with just the free account.
You can choose one of their templates to get you started if you’d like, but I usually just create my own design. To do that, I click the “Create a design” button in the upper right corner of the screen.
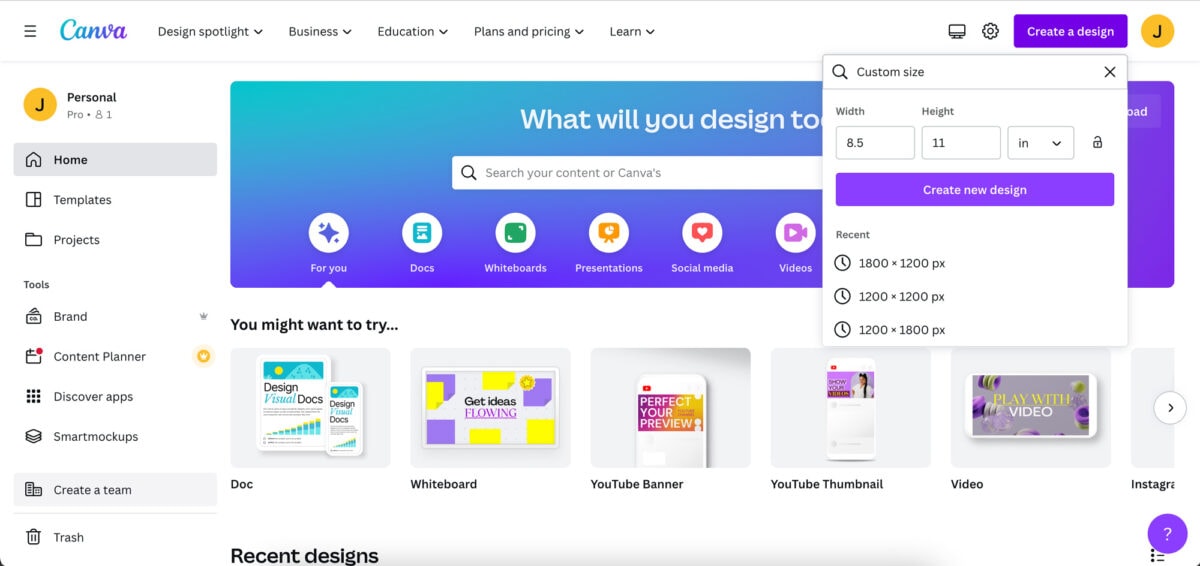
When I’m making labels, I usually choose the “custom size” option and set my page to 8.5″ x 11″ or standard letter size. This will allow me to print my sheet of labels on my printer without having to resize anything.
After I’ve typed in the size I want, I can click the “Create new design” button, and it creates my page for me.
From here, I can start making my labels!
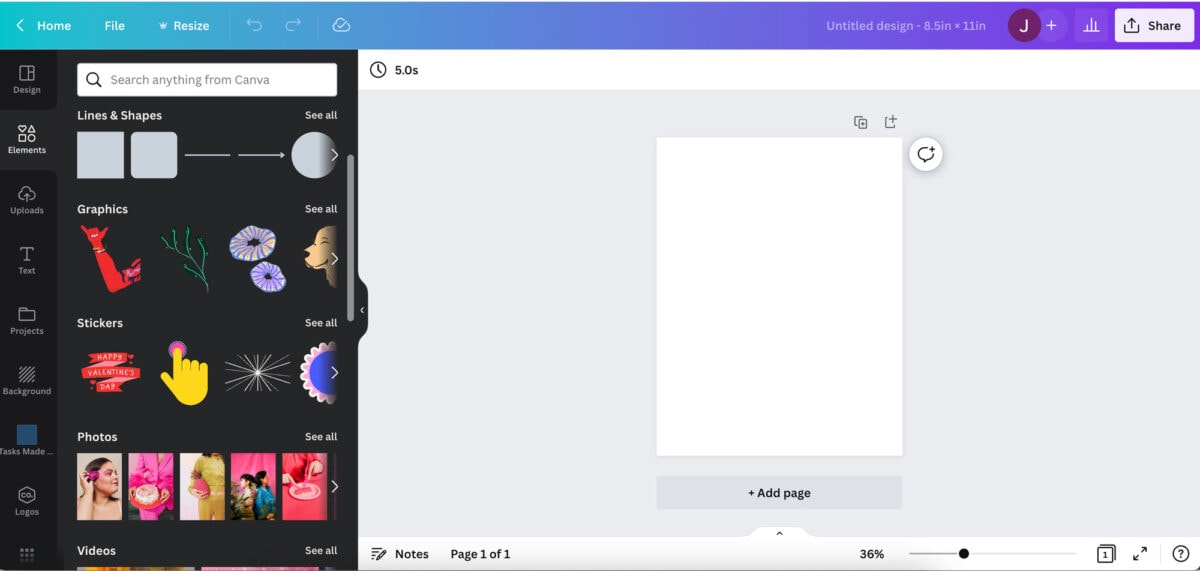
Step 2- Add a shape.
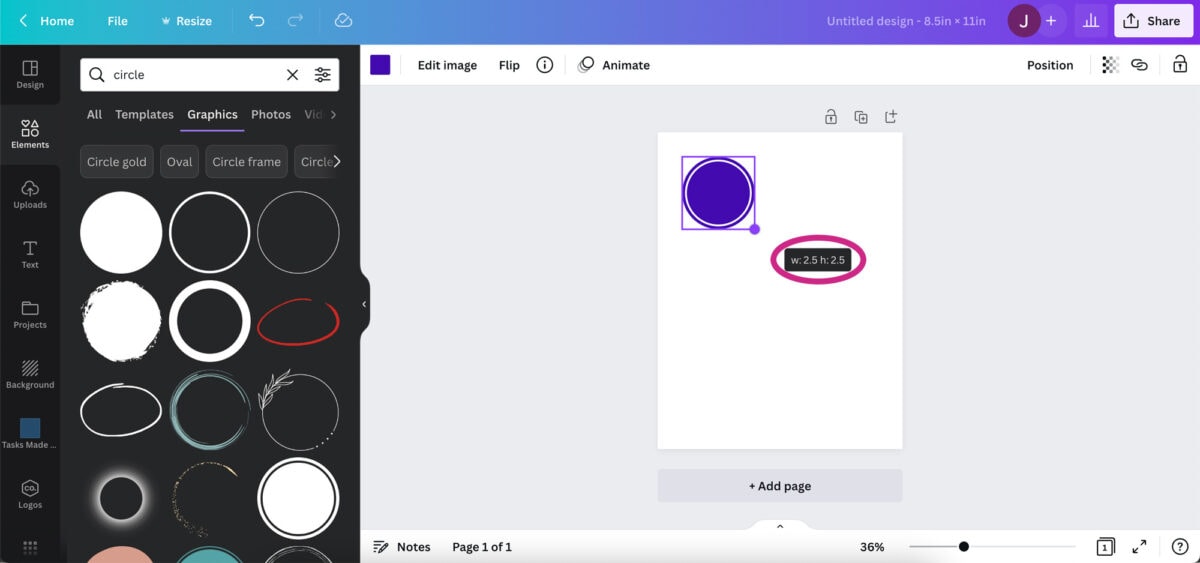
I’ll navigate over to the “Elements” tab on the left side of the screen and use the search box to find the shape I’m looking for. We’ll just start with a basic circle, so I’ll just type “circle” in the box, and it gives me several options.
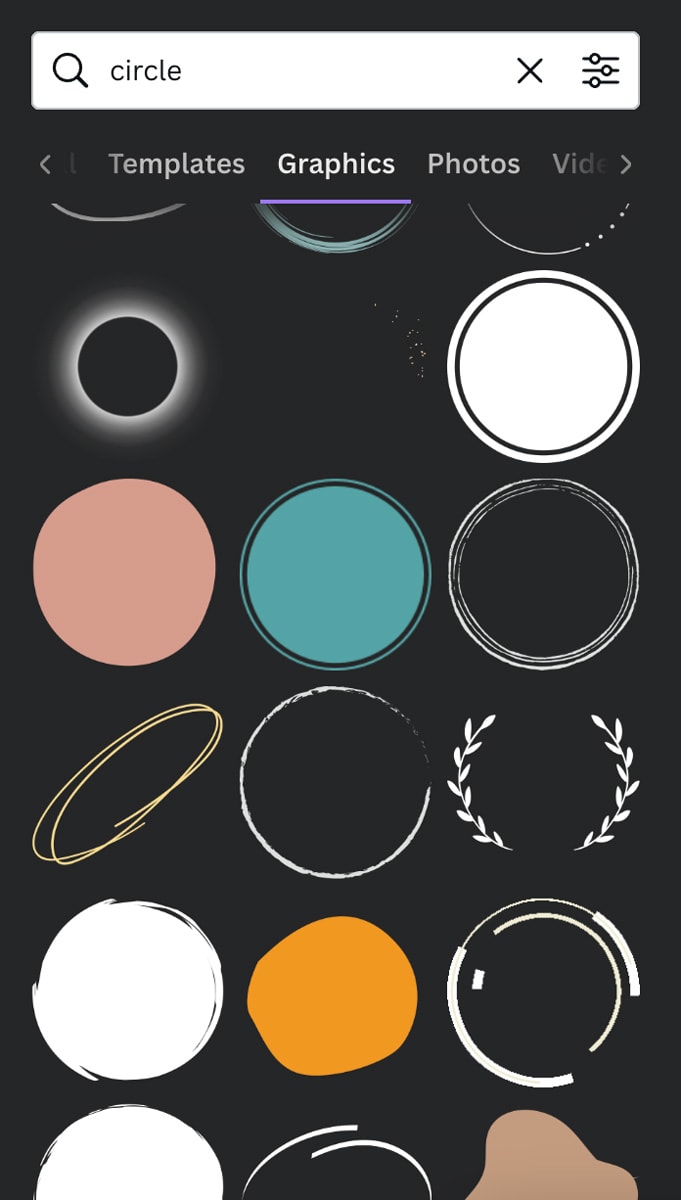
I’ll just click the one I want, and it adds it to my canvas. To change the color, I choose the square in the upper part of my screen. I can choose one of their pre-selected colors or click the plus sign in the color pane to create any color I want.

With the circle selected, I can drag the dots at the corners to resize it. As I drag the corners, Canva will show me the size of the circle I’m creating, which is helpful. I made this label 2.5″ x 2.5″, which is a size that I know works for a lot of my bins and containers.
Step 3- Add text to the label.
Once my label is the shape, color, and size that I want it, it’s time to add text. I can do so by clicking on the “Text” tab on the left side of the screen. I can really choose any of the options for my text– I can easily change the size, font, and color later– but I usually go with the “Add a heading” option.

The text will appear on my canvas, and I can type the word I want. In this case, I’ll type “flour.”
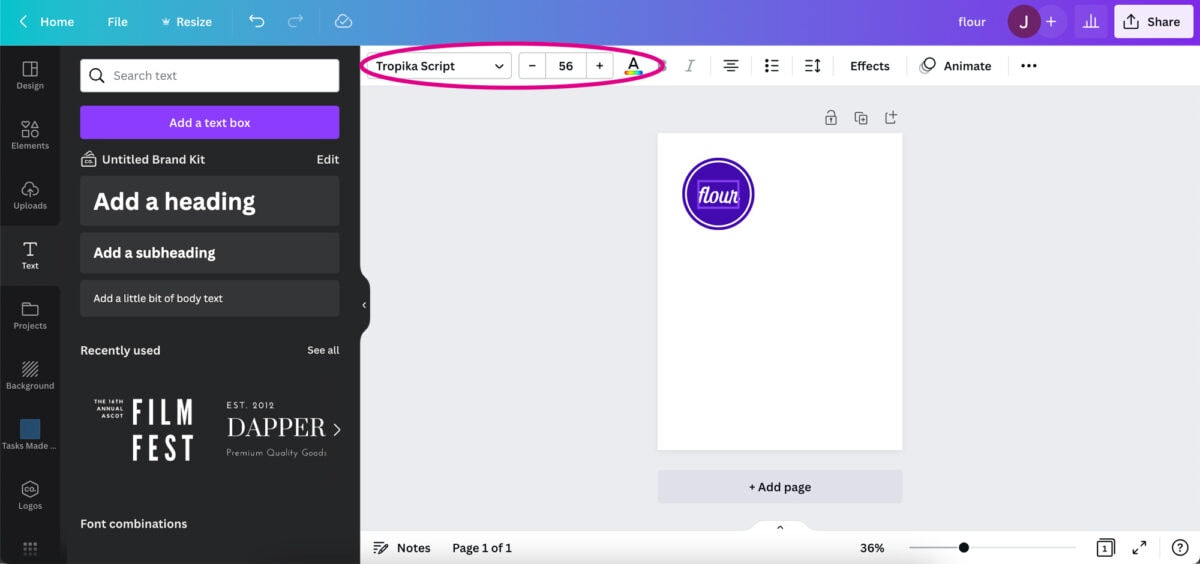
At the top of the screen, I can choose my font, size, and color. For this label, I used a font called “Tropika Script,” sized it at 56, and picked white as my color. When I drag the word on the screen, pink guides will appear to help me center the word on the label.
That’s it! We’ve made a simple label! But what if we want to make a whole page of labels in the same style?
Step 4- Duplicate the label.
Before I move anything around, I want to make sure that my label is going to stay together. I’ll hold down the “shift” key, click on the circle and the word, and then right click to bring up a bunch of options.
First, I’ll choose “Group.” This makes my label one unit, so I can move it around the canvas without worrying about it separating of getting off center.
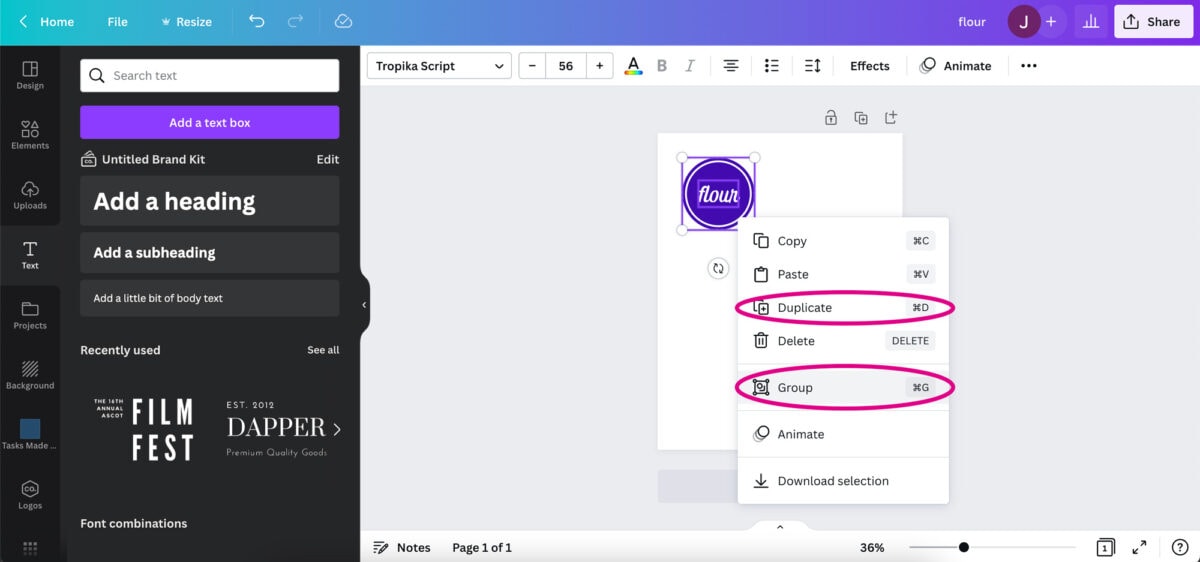
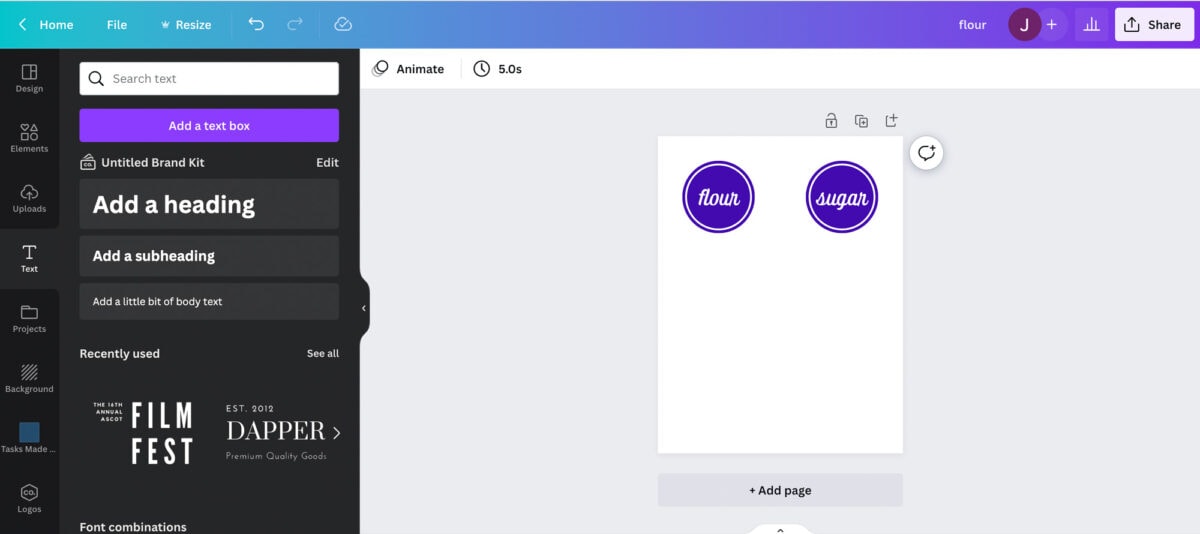
Then I’ll right click again and choose “Duplicate” to make a copy of my label.
I’ll move the second label to wherever I want it on the page. Then I’ll want to ungroup it so I can edit it more easily. I simply right click on the second label and choose the “Ungroup” option.
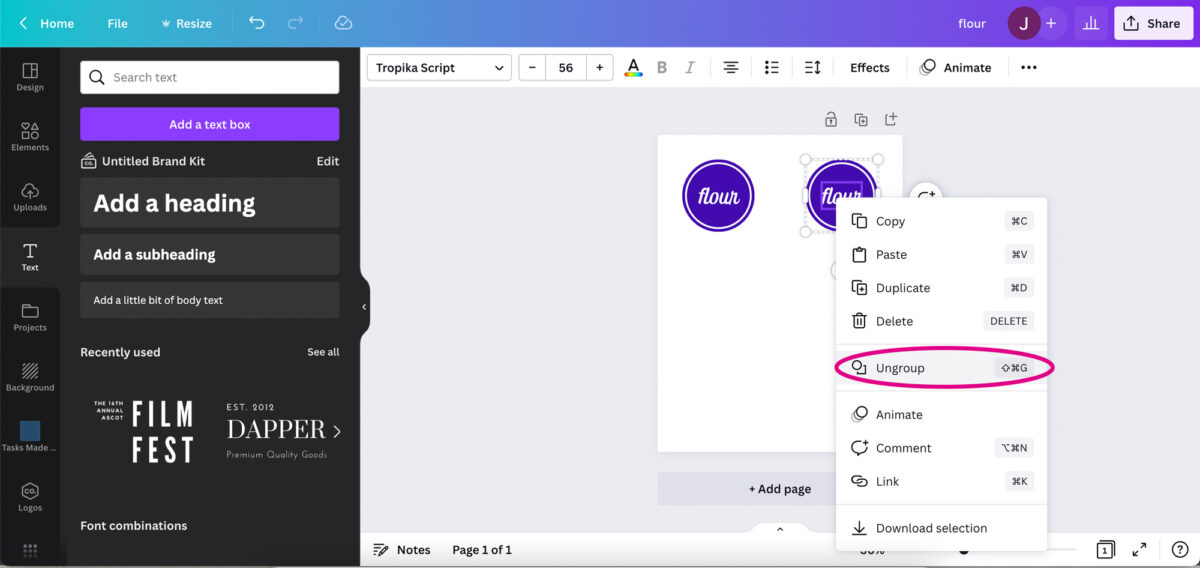
I double click the word to select it and can type my new word. In this case, I’ll write “sugar.” The font, size, and color will stay the same, though I could easily change them in the pane at the top of the screen if I wanted to.
It’s so easy to create pretty labels in Canva. We always have the option to add more elements, change colors, fonts, and sizes, choose a different shape, etc. We’re really only limited by our imagination when it comes to designing our labels!
Step 5- Save the labels.
When we’re finished designing, we can save a copy of our label sheet to our computer. To do this, click the “Share” button in the upper right corner. Choose the “Download” option and then select “PDF Print.”
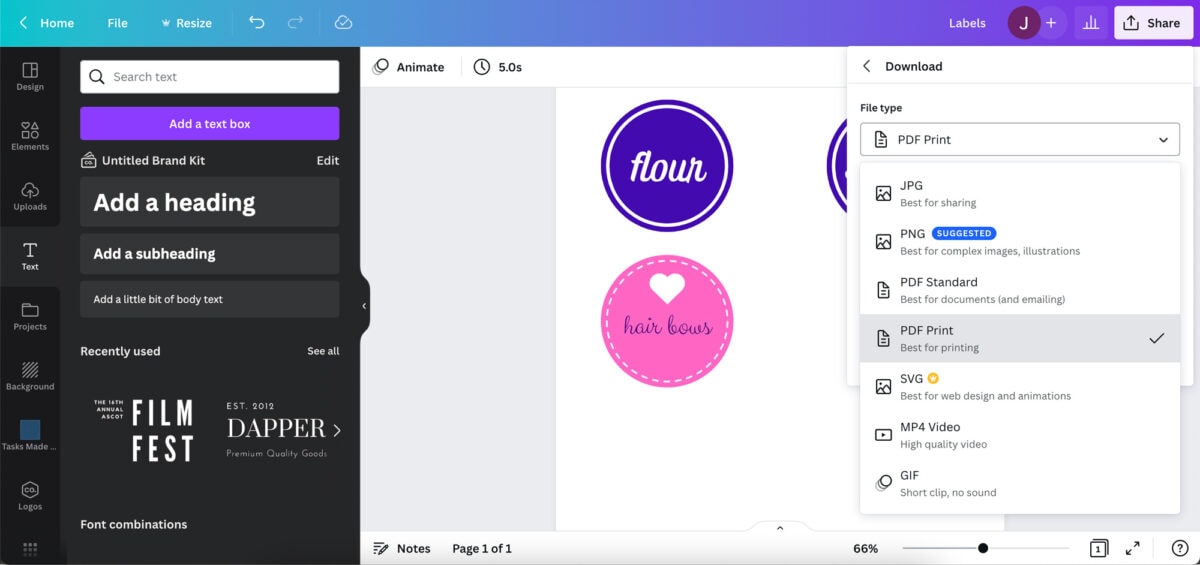
A window should pop up that allows you to choose the folder where you want to save your work. If it doesn’t, it will likely save to your “Downloads” folder automatically.
Canva also saves your work within your Canva account, so you can always go back in and make changes to your labels later.
Step 6- Print and attach your labels.
After you’ve saved your labels, you can open them up and send them to your printer like you would with a normal document. I like to print labels on white card stock so they’re a little sturdier, but if you only have regular paper on hand, that will work too.
If my labels are going to be in a high traffic area, I will typically laminate them so they stay in good shape.
My Favorite Laminator
I’ve had a version of this laminator for years, and it’s what I always use to make my printed labels a little more sturdy.

To attach labels to my bins, sometimes I will use my hole punch and string ribbon through. Other times I will simply use tape to attach them. I’ve also used velcro dots and those work well too. The best choice really just depends on your surface, as well as your personal preference.
Tips for Using Canva When Making Labels and Stickers
- Canva is the best program to use if you are using full sticker sheets or if you printing on card stock. For Avery templates or sticker sheets, I would recommend using Microsoft Word because they have pre-built templates specifically for that brand.
- You will need to create a free Canva account. There is a paid version as well, but I can get by with the free one.
- To use custom fonts you may have on your computer requires a paid account. However there are more than enough to choose from inside the software that are cute and free to use.
- While we are making labels for organization, this exact technique can be used to create fun stickers for all sorts of projects!
I hope that helps with your label making needs! 🙂 Have fun with it!
Canva Labels: Frequently Asked Questions
Want to save this post to revisit later? Be sure to pin the image below so you can find it easily!
Other Ways to Make and Use Labels
[Psssttt… Don’t miss our top 100 tips for organizing every single room in your house!]
Do you have a favorite program for making labels? I’d love to hear about it in the comments!
Happy labeling!

This post contains affiliate links. For more information, see my disclosures here.
Thanks Abby! I find it’s a good idea to label all storages. I started to implement it for keeping my papers and it’s really so convenient.
Abby, I am signed up for Canva and never thought about making labels. Thank you so much for the idea!
I have promised myself to get rid of a lot of things just hanging around the house taking up space. With a 1250 square foot space, I feel its closing in on me. Labels will help me get inspired and make a place for what I really want to keep. I,m 70 and need to start decluttering. And I have a laminator too!
Wish me luck!
Aren’t labels the best! And yay for decluttering! Best of luck with your project, Barbara!!
~Abby =)
Thanks so much! What a fun way to create labels. I opened another tab with Canva & followed along with your video periodically pausing yours to create my own labels! I learn best by watching & doing, so thanks again!! I’ll be creating labels this weekend!!
Yay! So glad it was helpful for you, Gail! Have a great weekend!
~Abby =)
Thank you, Abby! I think I am going to enjoy exploring Canva. And you are quite right, the video makes it very easy to grasp what you are doing. I, for one, would enjoy more posts demonstrating what could be done with such free online tools. (Although I do enjoy all your posts! But this is something I can go ahead and do myself immediately.)
So glad it was helpful for you, Monique!
~Abby =)
Where was this program again? Could you please give me a link to it? That is so coul.. I love FREE!!!
You can find Canva here: https://www.canva.com/. Thanks and have a great day!
~Abby =)
Thank you so much.. Have a blessed day 🙂
Thanks for sharing this information, I can see this coming in very handy
Glad it will be helpful, Kendell! Have a great day!
~Abby =)
Hi Abby and everyone, Canva has an app that helps printing home, on both plain paper and labels sheets from Avery etc. Go to canva.com/apps and search for labels (its called ecardify labels)