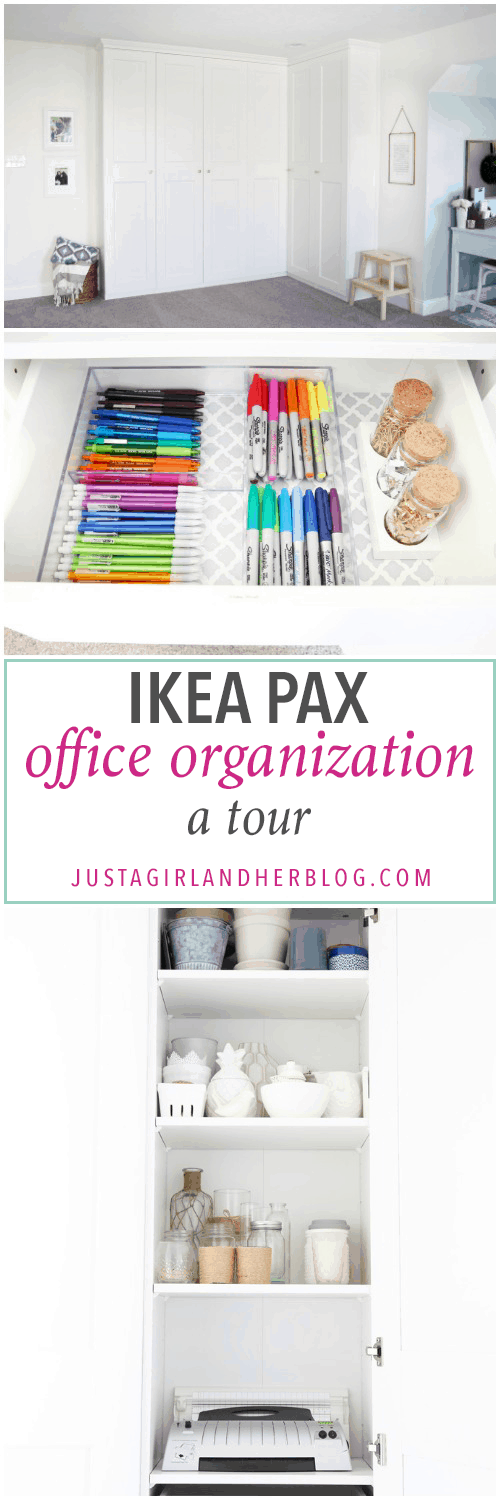
IKEA PAX Office Organization: A Tour
I’m sharing a tour of my IKEA PAX office organization! This system has added so much helpful storage to my home office space, and keeping it organized is now a breeze!
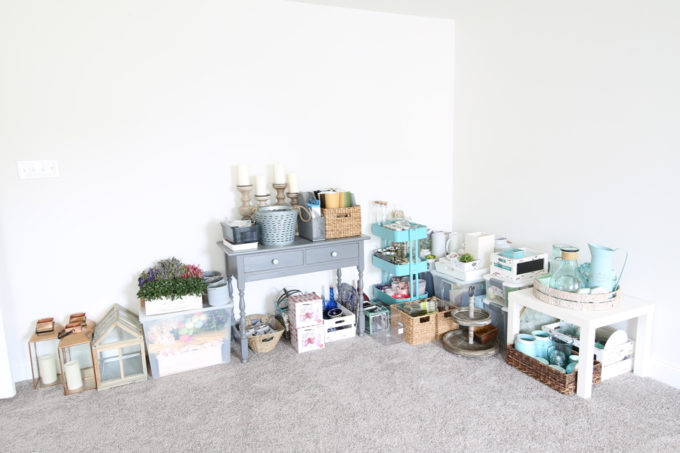
A few weeks ago when I initially talked about my new office storage system, I promised I’d be back with alllllll of the details of how I organized it, and today is the day! If you remember my office from our one year home tour, I was just using a bunch of random leftover furniture pieces in this corner to organize my items…
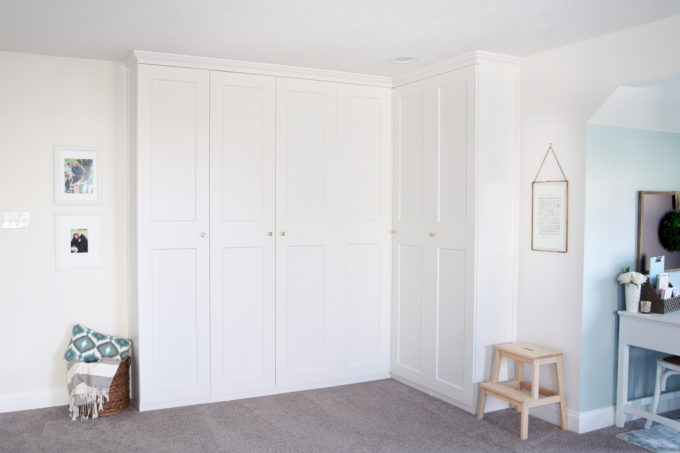
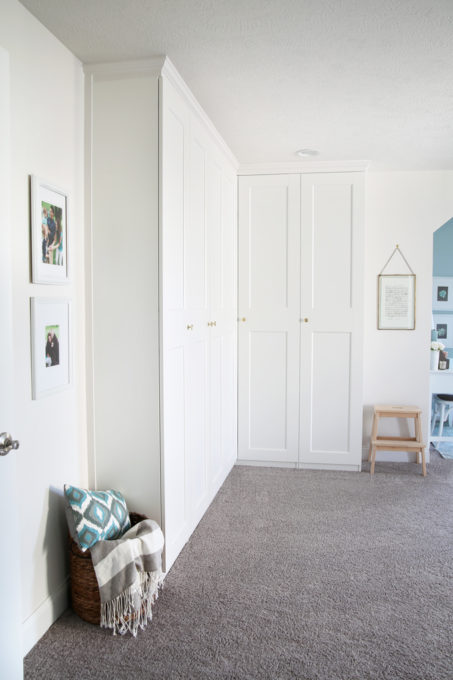
Right after the New Year, though, we decided to add some beautiful and functional storage and I’m so excited about how it turned out! I ended up going with the IKEA PAX system, and it has been the perfect solution for this space. It has tons of storage, but it is still narrow enough that it fits right into the room. (If you want to know more about the PAX system itself, I wrote a post about it here.)

Today I wanted to give you a tour of the interior of the storage system and talk about how and why I organized everything the way I did! First, as I was getting ready to fill up the new cabinets, I made a point to go through and get rid of a ton of stuff. I threw away everything that was broken or unusable, I gave away a bunch of things I wasn’t using anymore, and I had a decent pile to donate as well. It felt so good to get rid of so much stuff!
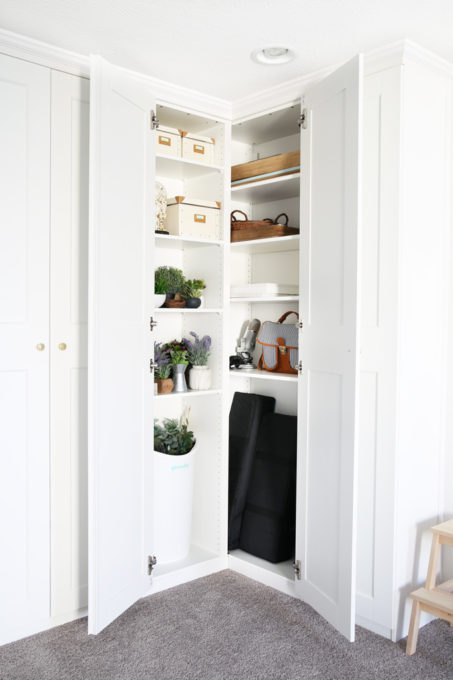
Let’s take a peek inside the cabinets!
IKEA PAX Office Organization: A Tour
This post contains affiliate links. For more information, see my disclosures here.
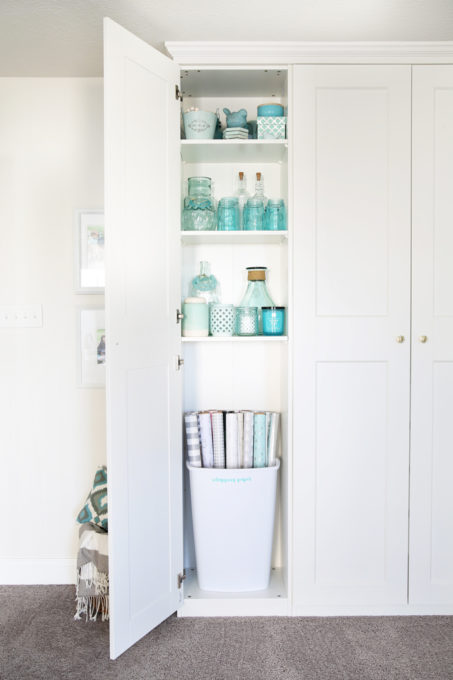
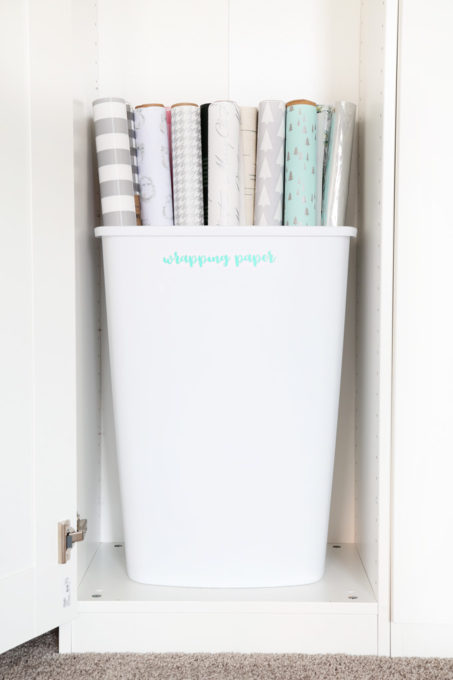
This first cabinet holds my gift wrap. I ended up putting it in a plain white garbage can that we already owned, and then I just made a vinyl label for it with my Silhouette Cameo cutting machine.
One of my big needs was a place to hold all of my decorative items that I’m not using during a particular season, so I have space for that in a few of these cabinets. I opted to organize my decor by color so I could easily find what I’m looking for.
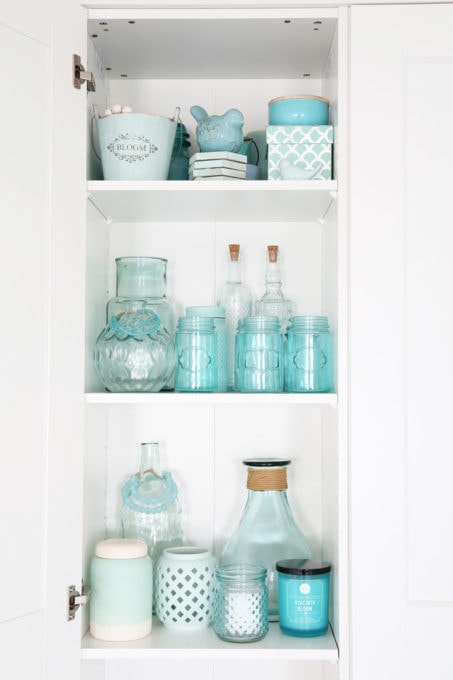
This, obviously, is the aqua section! If you’ve been around the blog for very long, you know that I typically use a lot of aqua in my home! Since we just put away the Christmas decor I haven’t gotten all of my aqua back out yet, so there is quite a bit still in the cabinet.
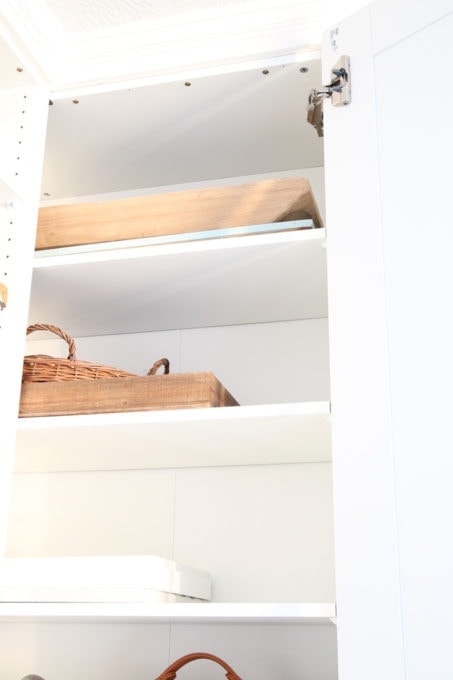
This second cabinet is the biggest one, so it holds a lot!

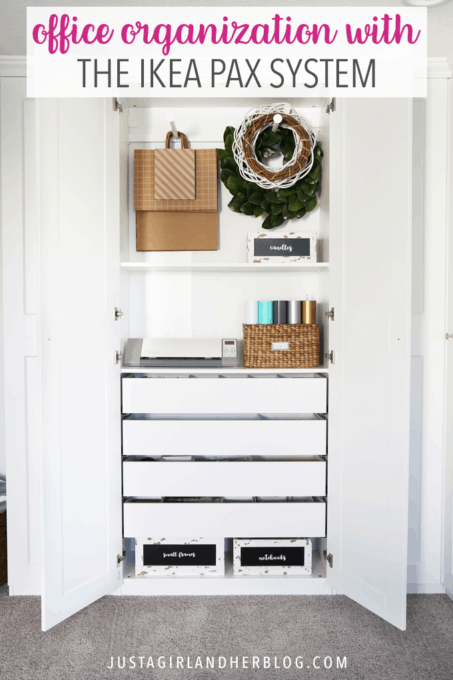
At the top there is a rail that is made for the PAX system, which I’m using to hold some of my larger gift bags as well as the wreaths I’m not currently using around the house.
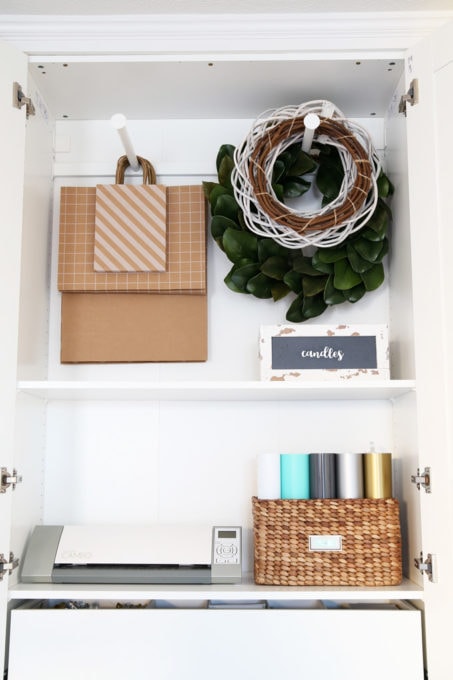
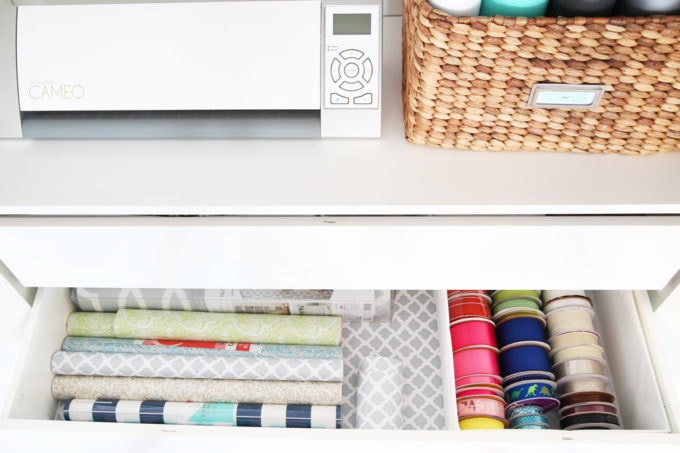
The shelf holds my Silhouette cutting machine and vinyl. I’ve had the basket for years and just put an adhesive bookplate on it. I then used my label maker and some washi tape to make a pretty label!
I used some crates I already had for extra storage in this cabinet as well. The one in the above photo holds candles. I also have two crates down at the bottom of this cabinet. Because of the hinges for the door, I couldn’t put the drawers all the way down at the bottom, so the crates– which hold notebooks and small frames– were a great way to make use of that little bit of extra space.

Again, I used my Silhouette + adhesive vinyl for the labels.
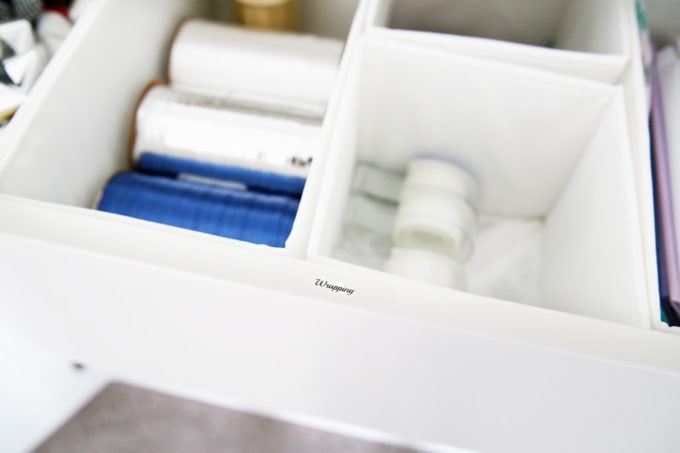
Now let’s take a peek in the drawers! The top drawer holds my gift wrap supplies. A few weeks before Christmas, I had created a gift wrap station, which worked really well for the holidays, but then I was able to transfer all of my gift wrap items into this unit when we installed it.
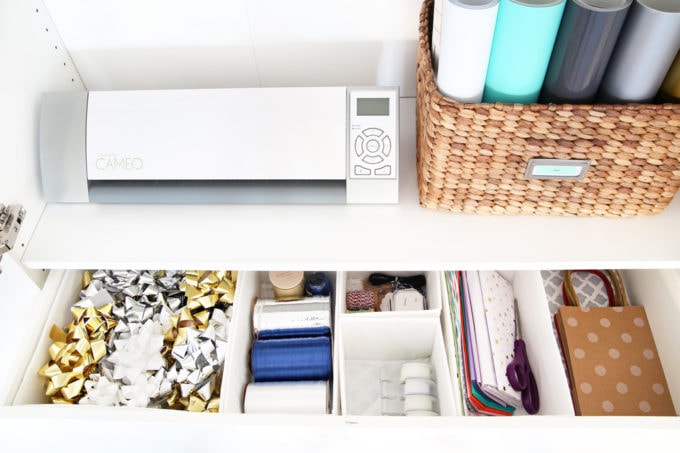
These are IKEA’s SKUBB boxes holding all of the different elements, and they fit into the PAX drawers perfectly. I used my label maker + clear tape to put little labels on the edge of the drawers so I can quickly see what’s in each one without having to open them.
They’re discreet enough that they don’t get in the way. I also love that my new label maker lets me use pretty cursive fonts– I have this one and love it!
The next drawer down holds all of my contact paper and another SKUBB box with ribbon. And speaking of contact paper, I used my favorite pattern to line all of the drawers. I have used it in so many cabinets and drawers in our house!
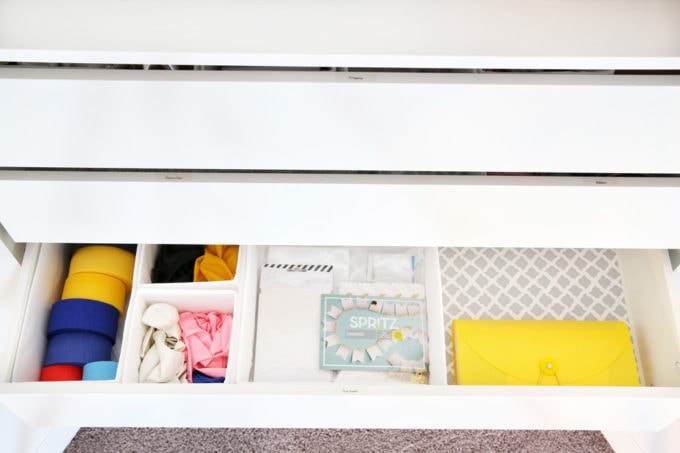
The third drawer holds party supplies– streamers and balloons and then banners and bags. The little accordion file holds cards for all different occasions so I always have them on hand and don’t have to run to the store every time there is a special event.
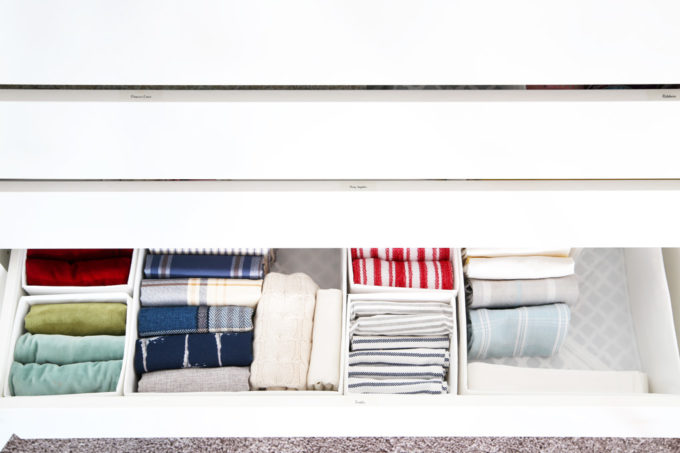
Finally, the bottom drawer has textiles– there are those SKUBB boxes again! I fold up my extra pillow covers and decorative towels using the filing method so they sit neatly and I can always find what I’m looking for. (I have a post and video all about the method I use to fold here.)
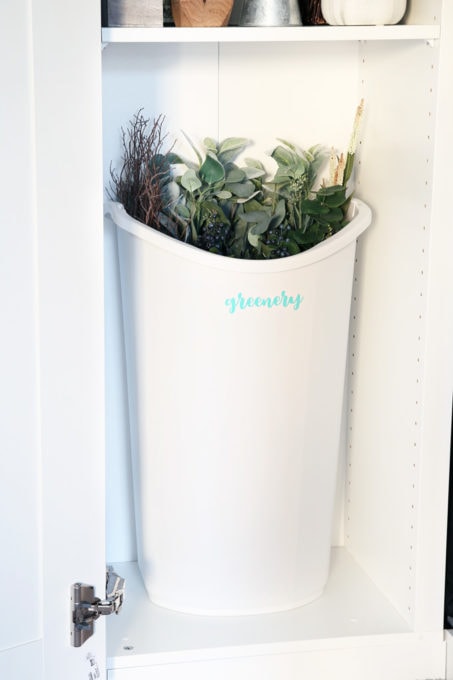
The corner part of the unit is next, which has double doors that swing open wide for easy access. I have a black thumb (oops!), so I keep a lot of faux greenery and flowers around for decorating.
I used another plain white trash can that was sitting in our basement to hold the longer greenery stems. It also has a cute aqua label that I made with my Silhouette machine.
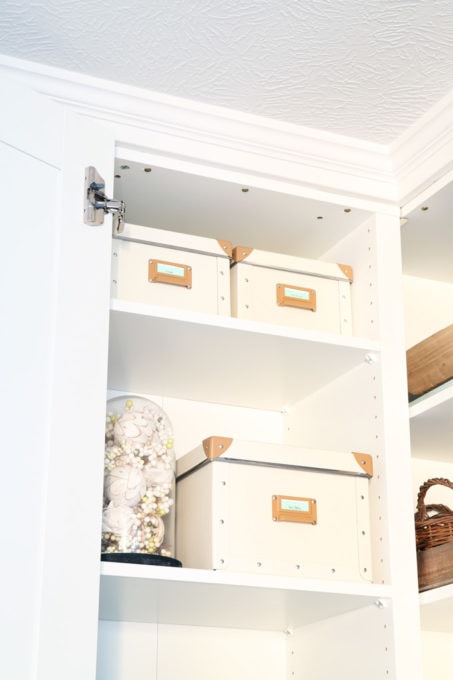
Up in the top section are more of my faux plants and flowers, along with a few boxes from IKEA, where I’m storing some vase fillers, cords, and some small camera accessories.

I used washi tape + a clear label from my little label maker to create the tags for the boxes.
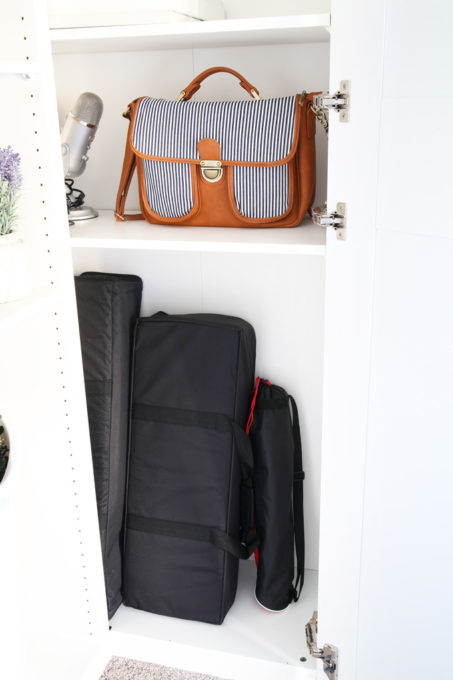
On the other side of the corner cabinet I have some photography equipment– lighting that I use sometimes and my tripod. I also store the bag for my DSLR camera in this space, and in the back I have a microphone I use for webinars or recordings.
The upper shelves are holding some wall decor and trays that I’m not using anywhere in our house currently.
And finally, on to the last cabinet!

This final cabinet holds more of my decorative knick knacks that I’m not using– blues and neutrals at the top, white in the middle, clear + clear with rope and a little bit of pink further down.
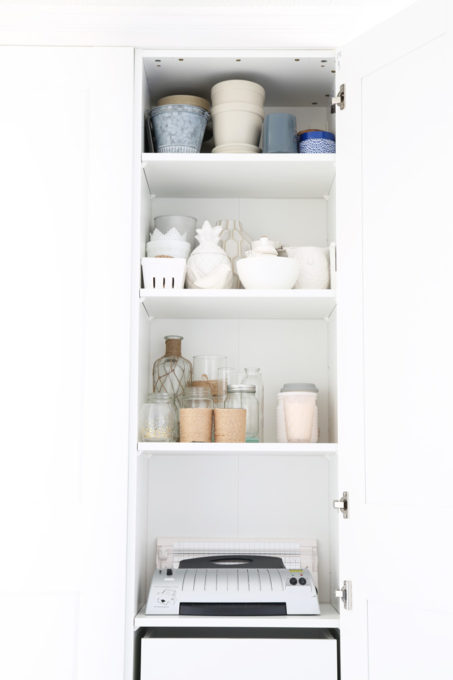
This shelf above the drawers holds my laminator, and I was able to tuck my paper trimmer behind it.
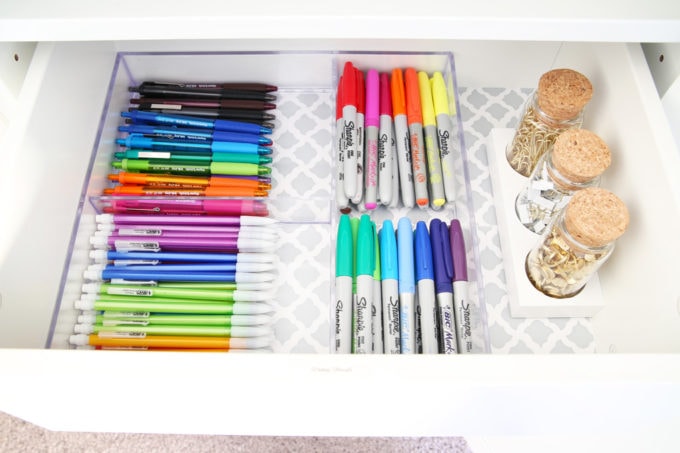
I was able to fit four narrow drawers in this cabinet, and they primarily hold office and craft supplies. The top drawer is mostly writing utensils. I used this little three part organizer, which is storing pencils, pens, and Sharpie markers. I also had some room for a few pretty office items.
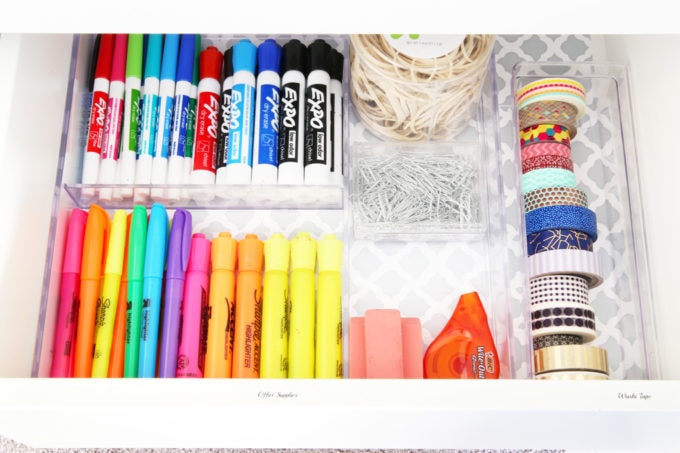
The next drawer down holds dry erase markers and highlighters, rubber bands and more office supplies, and finally a row of washi tape. I labeled the edges of these drawers with my label maker, just like I did on the other set of drawers.
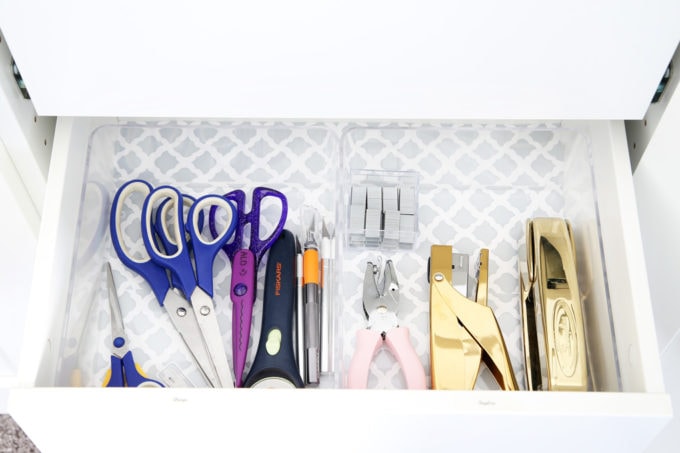
The third drawer holds a bunch of scissors and other sharp items, along with a few staplers, staples, and my cute heart hole punch. The clear bins are the part of the GODMORGON set from IKEA.
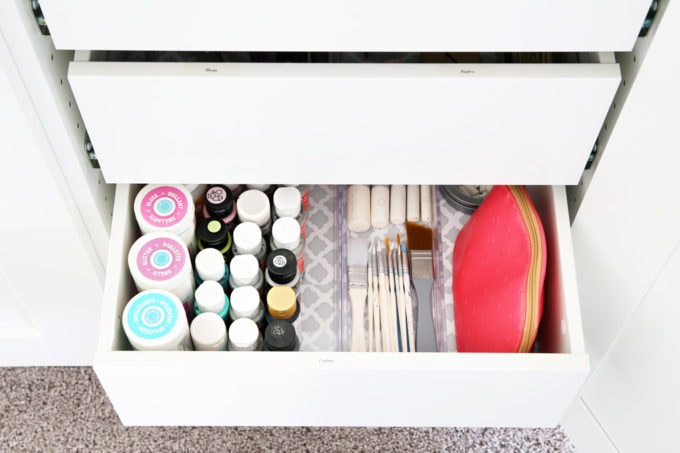
The last drawer holds craft supplies– paint, brushes, and some little pliers in the bag. (I used this bin and this bin, both by InterDesign.)
(If you’re looking for a smaller organizing solution, I’ve also organized office and craft supplies using an IKEA RASKOG cart!)
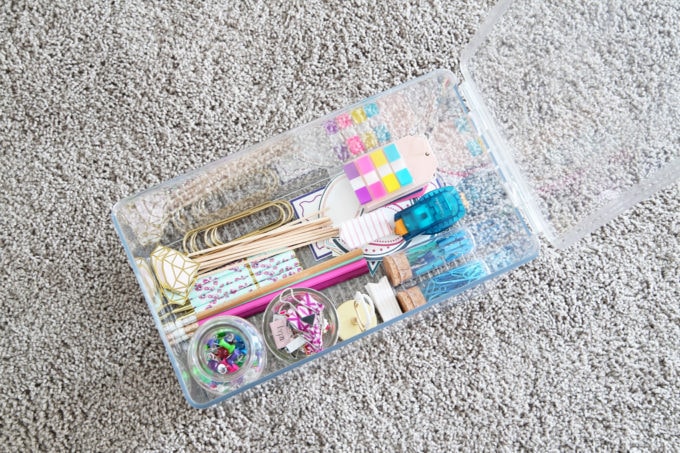
Finally, as with the other set of drawers, I was able to fit a couple of bins below them, so I used these clear lidded InterDesign bins.

One holds paint chips and the other is a little kit of props that I use when I take photos of printables. It’s nice to have them all in one place so I can just pull out the kit any time I’m photographing.
Whew! If you’re still with me, I’m seriously impressed. That was a lot! I’m pretty much in love with this side of my office, and I can’t wait to whip the other half into shape. It is one of the big projects I want to complete in 2018, so I’m sure I’ll have more posts and videos about office organization as the year goes on!
Sources
Silhouette Cameo cutting machine
Updated version of my laminator
Paper trimmer (similar)
3 part organizer for writing utensils
Clear bin holding paint brushes
[Psssttt… Get 100 brilliant ideas for organizing every room of the house here!]
Thank you so much for taking the tour of my new office storage! If you have any favorite office organization tips and tricks, I’d love to hear about them in the comments!
Have a wonderful day!

This post contains affiliate links. For more information, see my disclosures here.
I love the organization system you set up. I really love the idea of the Silhouette and the laminator being behind the doors, but I do have one question. Do you have access to a plug in the cabinet, or do you have to remove the Silhouette and laminator to be able to use them.
Hi, Karen! I bring them over to my desk to use them. Both pieces need more space to run well than what they would be able to have sitting in the cabinet. Hope you’re having a great weekend!
~Abby =)
Thanks. That’s what I was thinking. I love the blog and have gotten so many awesome ideas from it. Thank you for doing such a great job and sharing with us.
Love it! Which depth did you choose for the Pax system
Hi, Julie! We went with the narrower 13 3/4″ depth! I went into more detail about the exact pieces we chose and why we chose them in this post if that would be helpful: https://justagirlandherblog.com/organized-office-ikea-pax-system/ . Hope you’re having a wonderful weekend!
~Abby =)
Absolutely love this set up!! Thanks fur all the details.
Oops. Typo! “for”
Thanks so much for stopping by, Michelle! Have a great day!
~Abby =)
Hi Abby. I am so happy for you! It’s so nice to be organized and behind doors. Love the PAXX rods that are holding your wreaths and gift bags. Such a great way to store these challenging items. Enjoy your “new” office! 🙂
Thanks so much, Darlene! I am LOVING it! Hope you’re having an awesome week! <3
~Abby =)
That is gorgeous! I can’t believe how much you’ve managed to fit in there!xx
Thanks so much, Rhiannon! It really does fit SO much! I’m loving it! 🙂 Have an awesome day!
~Abby =)
Oh to have an office space like this and be able to organize it like this… I’m green with envy!
My office is turning in to a baby room, so I’ve had to move my supplies in to the basement for now… Eventually we want to renovate the basement, but until then, it’s just stored on random shelves in random disorganized boxes and bins…
Thanks for sharing!
Thanks so much for stopping by, Jena! Have a great day! <3
~Abby =)
Recently found your blog and love your organizational tips. Esp. interested in your home office project since we will be trying to create a (very) small home office space in a second floor loft area. It will include a fax/printer so was wondering if the IKEA PAX system allows you to plug in your laminator or label maker where they are in the shelf system to use them there, or do you need to move them to a surface near a plug?
Thanks!
Hi, Laurie! I have been taking them out to use them. There is actually a plug in the cabinet where the laminator is behind the drawers (we cut a hole in the backing of the PAX system so we could access the plug if we needed it), so I could plug it in if I wanted to, but my desk is right there, so it is easy enough to set it on my desk and use it and then put it back. I hope this helps. Have a great weekend!
~Abby =)
I love this system! It also looks like command hooks would work well on the doors or sides if needed to hold some smaller items. Sharpies- I’m slightly addicted. This looks great Abby!
Yes, command hooks would definitely work! Thanks for that idea! 🙂 Have a great day, Misty!
~Abby =)
I really needed this right now. I have an open space where I want to use for my craft supplies and this would be perfect. I like that you can choose what you need , shelves or drawers. Thank you!!
So glad it was helpful, Christy! We are LOVING it! Hope you do, too! Have a great day!
~Abby =)
Very nice, Abby!
Thanks so much, Jean! Have a wonderful day! <3
~Abby =)
I love your PAX system and the room, in general. We’ve had snow now for a few days and I’ve had plenty of time to organize as my University (employer) has been closed until today, but I haven’t had the supplies/system to organize with. I must get on that so that I can take advantage of the next snow days.
I love seeing how you can use the PAXX “wardrobe” system in a way that’s not necessarily for a wardrobe! It’s giving me some inspiration on how I could possibly use it in other areas in my house. Thanks for the tour!
So glad it was helpful, Hannah! Thanks for stopping by. Happy Friday! <3
~Abby =)
Wow, very impressive!! I was actually looking at the paxx and others similar to it. Just curious, how long did it took to build? It doesn’t look IKEA, looks high end. Luv it, and how you organized it! I need a ribbon drawer…great ideas. . Thanks for sharing!
Thank you so much for your sweet words, Katy! I would say it took about a day and a half to install the PAX pieces and another day and a half to add the crown molding/trim pieces. I hope this helps! Have a great weekend!
~Abby =)
Your space is absolutely beautiful. You were so wise to line the drawers before you started using them–and a bottle of glue or paint spills in one! I would settle for a set of bookcases so I can stack stuff higher and deeper; I’m a packrack.I have been known to buy another bottle of acrylic paint caz I can’t find the one I need! Well, I use it up, eventually! Thanx for sharing your home with us!
Thank you so much for your sweet words, Kathy! Hope you’re having a wonderful weekend!
~Abby =)
This is wonderful; your home office looks so inviting. Love the colors. Our office is a bit tougher to organize as the walls are not straight. They are triangular so we can’t put big bookshelves in. I would love some suggestions how to organize our office a bit more interesting.
Ooh that does sound like a challenge! It’s hard to know without being able to see the office, but I’m wondering if some sort of modular system would work for you so you could pick and choose the sizes. IKEA’s BESTA system is like that, and I’m sure there are others that are similar. Best of luck with your space!
~Abby =)
I submitted a comment, but my page glitched & I can’t find any evidence that comment went through….so I’m posting it again! 🙂 First, I just wanted to say that I love your organization system! Things aren’t put away just for the sake of putting them out-of-sight. They’re put away in such a practical way! Second though, I’ve gotta know where you got the 3 little jars (with cork tops) that you have paper clips, binder clips, etc. store in! I’ve been going through my basic office supplies & have been trying to find a cuter way of organizing those little items!
Thanks,
Sierra
Thank you so much for your sweet words, Sierra! Those little bottles are from Target and they came as a set with the supplies already in them. 🙂 Have a great week!
~Abby =)
What is the color of your walls???
The color in the nook is Sherwin Williams Rainwashed. I LOVE it! 🙂
~Abby =)
I love what you did with this system. I’m curious about the cost of this vs. having a contractor build one. If it is ok to ask, what did your Pax closets cost?
Ooh we did this a couple of years ago, so my memory is a bit fuzzy, but I want to say that the unit we built was around $700? We didn’t get a quote from a contractor, so I’m not sure how it would compare. I do love all of the different interior organizers that IKEA offers in their units though.