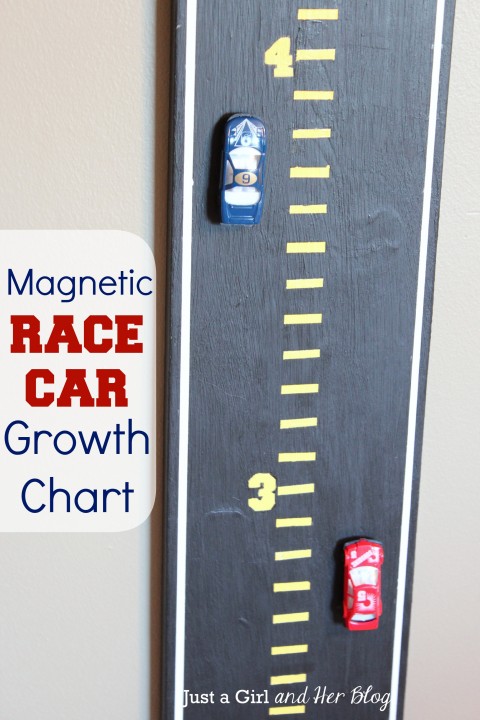
Magnetic Race Car Growth Chart
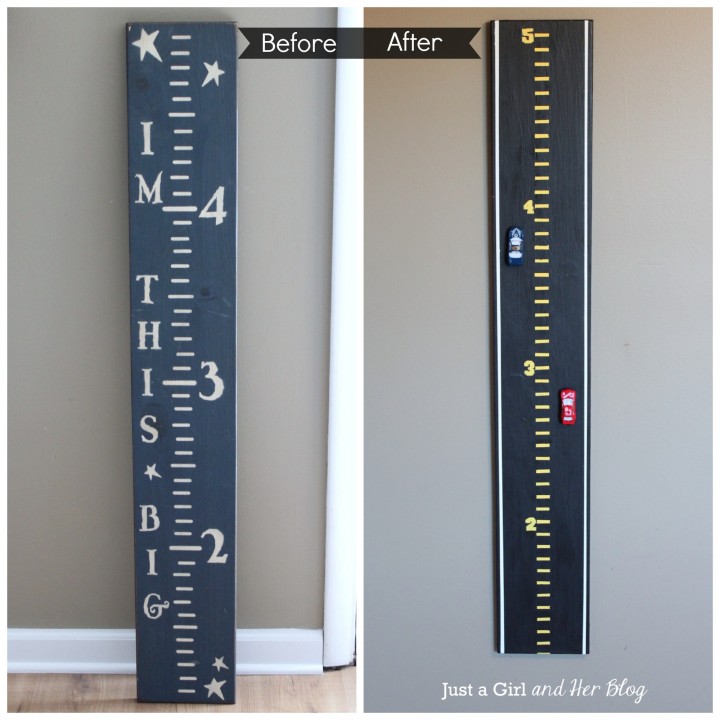
Today’s project started with a piece that I picked up for FREE!!! Woo-hoo! A couple weeks ago my sister texted me and asked if I wanted this growth chart that they were getting rid of at her work:
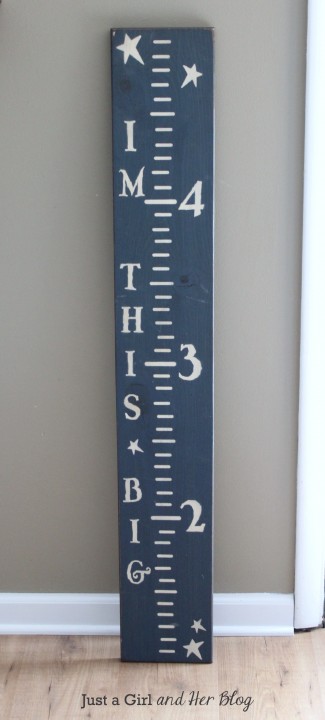
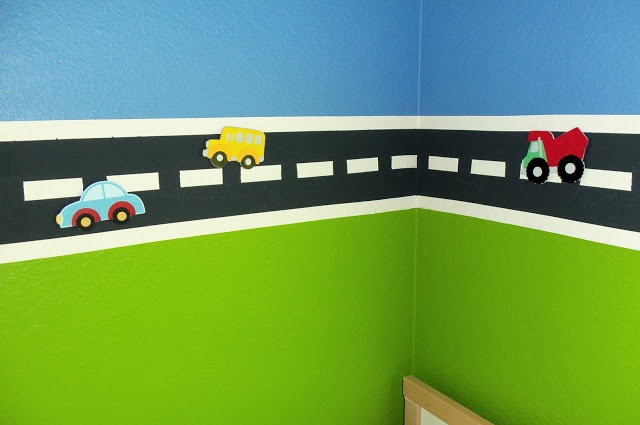
I was about to text her back, “No! I’m trying to get rid of junk in my house, not add more!” when I had a vision. I remembered seeing those super cool magnetic racetrack walls on Pinterest, like this one from Cutesy Crafts:
While I wasn’t ready to commit to a whole wall, I thought that the C’s would love a growth chart where we marked their height with magnetic cars, so I told my sister I’d take it and set out to create a fun little decor item for the Cs’ room. Along with my free growth chart, here’s what I used for this project:
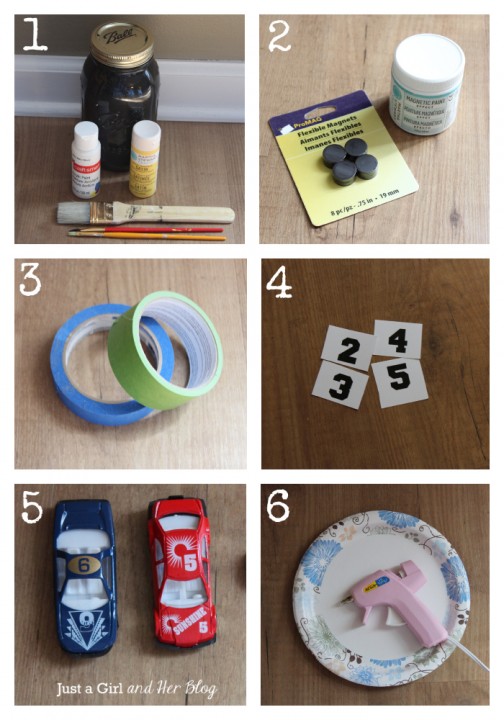
1. Paint {I used black wall paint and white and yellow acrylic paint since that’s what I had on hand.} and Brushes
2. Magnetic Paint {I used Martha Stewart brand, found at Michael’s.} and Magnets
3. Painter’s Tape
4. Numbers, Printed on Card Stock
5. Toy Cars {Buy the cheap ones from the dollar store! They’re lighter and stick more easily!}
6. Glue Gun
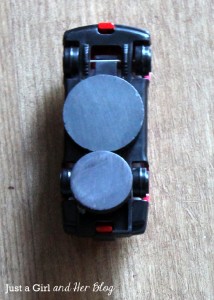
Step 1- Hot Glue Magnets to the Cars
I did this step first so I could test the cars’ magnetic ability while I was creating my chart. I used one large magnet and one small magnet on the back of each car. I found that one magnet wasn’t “sticky” enough and three magnets made it too heavy, so two it was!
Step 2- Paint Your Piece of Wood with Magnetic Paint {over and over and over again}
I began by applying the magnetic paint to my growth chart. The container recommended two or three coats, but I tested out the cars along the way and ended up doing five coats {using all of my paint} to really make them stick.
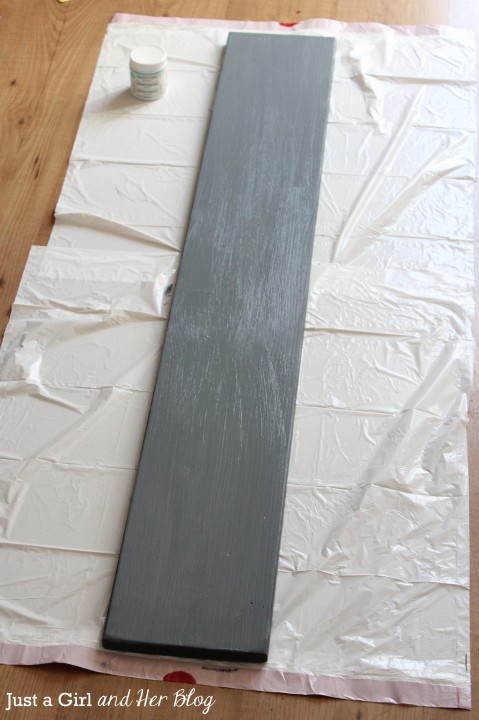
Step 3- Paint It Black
I only used one coat of black paint because it covered well, and I was worried that if I used more than that the board would lose some of its magnetic quality.
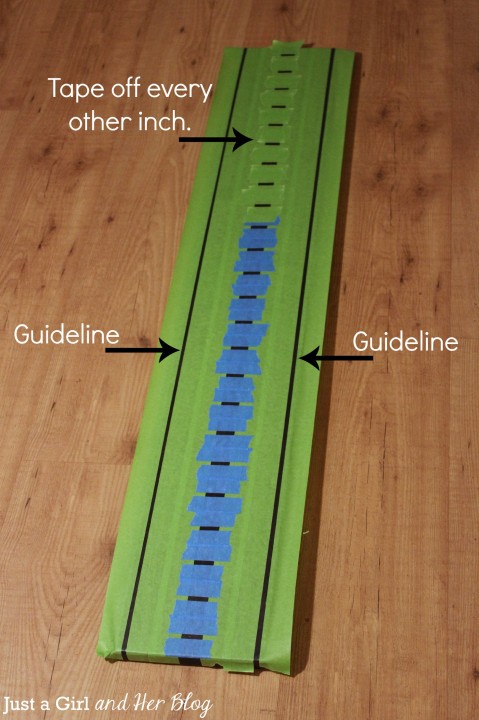
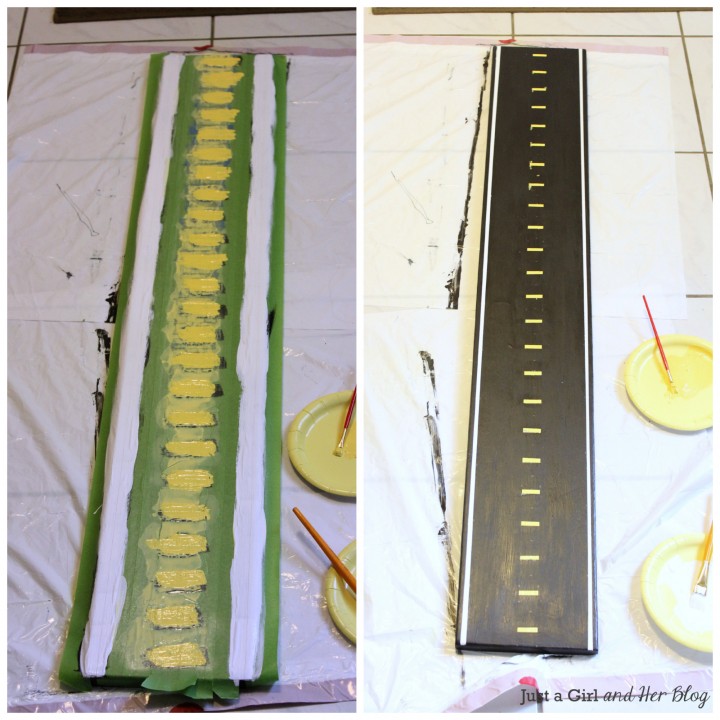
Step 4- Mark Out the Lines and Tape It Up
Here’s where it gets a little tricky to explain. I wanted the board to look as much like a road as possible while still having the growth chart hash marks down the middle. I enlisted handy hubby to help me mark off the lines and tape them off. First we measured in 1/4″ from each edge and measured for a 1/4″ wide line going down each side. {These will become the white guidelines on our “road.”} After we did all of our measuring, we taped off those lines.
Next we measured and taped off a 1″ wide strip down the middle for our hash marks. we marked out each inch in pencil, then measured 1/8″ above and 1/8″ below our marked line so that each hash mark would be 1/4″ high. Since our painter’s tape was too wide to tape off every inch at the same time, we began by taping off every other inch.
Step 5- Seal the Tape Lines
I have read a million tutorials about painting stripes on walls, and the bloggers always recommend sealing the tape lines by painting a thin coat of the base color over the edges in order to create really crisp, clean lines with no bleeding. I figured if it worked on walls, it would work on my itty bitty little growth chart too, so I painted over the edges of my tape with black paint to seal them.
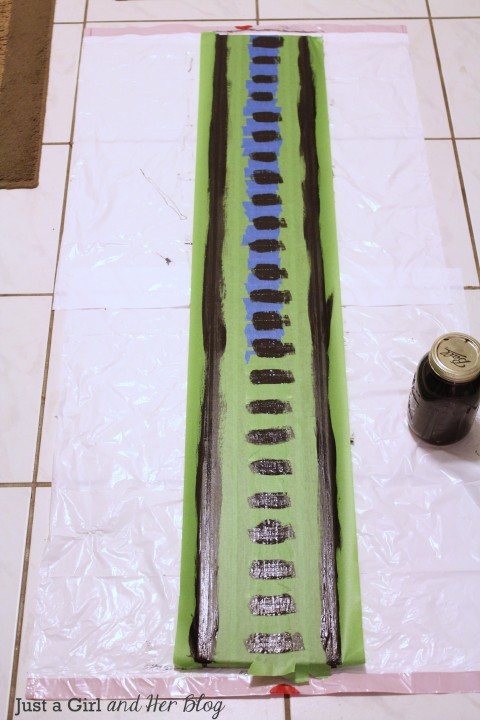
Step 6- Paint the Lines!
Now that everything was finally prepped, it was time to paint the guidelines white and the hash marks yellow. I first tried spray paint for my yellow lines because I thought it would be quicker, but it came out really splotchy and icky. I ended up using acrylic paint for both the white and yellow lines, and I was very pleased with how it turned out.
{The tape sealing method ended up working really well! There were a few small spots that I had to touch up, but for the most part, it worked like a charm!}
Step 7- Tape and Paint the Remaining Hash Marks
We can’t just measure every other inch! Once the paint dried, hubby helped me mark off the opposite hash marks so that I could paint those as well.
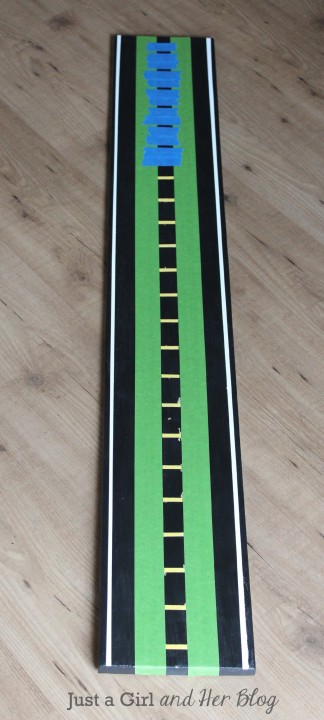
{This is when it’s partially taped, so you can see how we’re taping off in between our existing hash marks.}
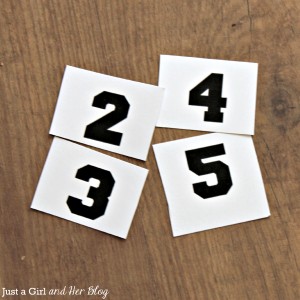
Step 8- Add the Numbers
A stencil would work just fine for this. Since I didn’t have one, though, I went back to my old chalk transfer method that I described in my monogrammed onesies post, using chalk on the back of my card stock numbers to create an outline on my growth chart. I then filled in the outline freehand.
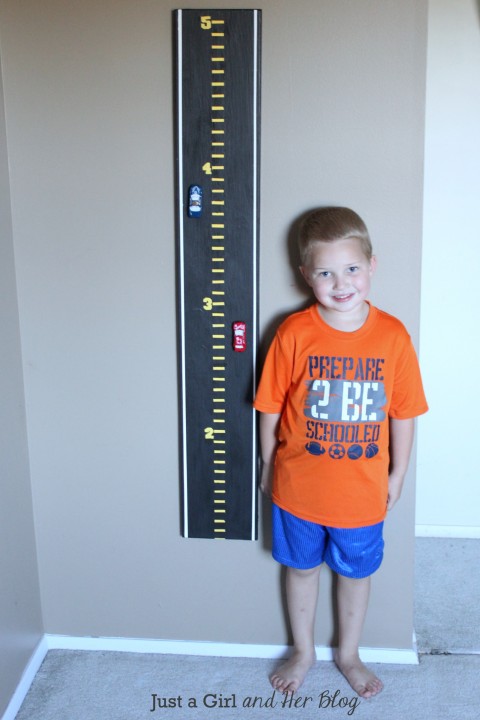
Step 9- Admire your work!
I admit, this project ended up being more work than I imagined for a simple growth chart, but I LOVE how it turned out!
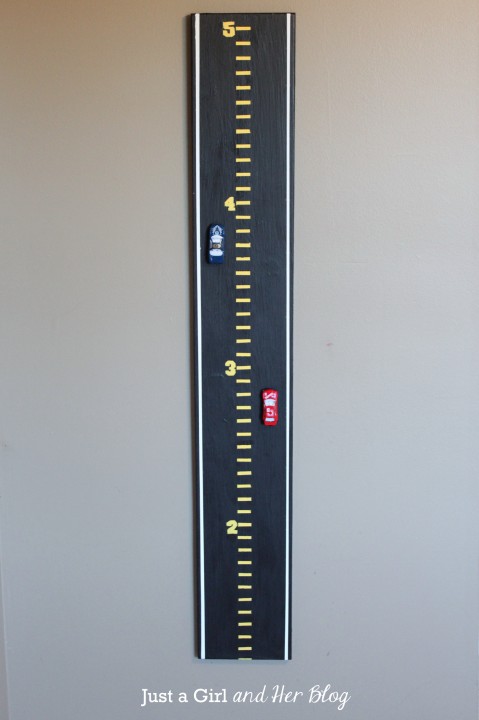
And the Cs love it too, which of course was the ultimate goal!
Oh, and I couldn’t leave you without a good old before and after, so here ya go:
Have you upcycled anything lately?

This turned out so stinkin’ cute, Abby! What a fun and clever way to track the boys’ growth! Have a great day! XO
Thank you so much, my friend! Hope you are having a wonderful week!
~Abby =)
This is SO cute, Abby! I am going to share it on my facebook page if you don’t mind!
I appreciate it! Thank you so much, friend!
~Abby =)
It’s adorable! I keep meaning to make or buy growth charts for my kiddos but am a slacker. 🙂
Question: Will you keep track of past heights once the cars drive on up the chart? If so, how will you do that?
Thanks, Laura! I have so many “planned” projects, but it’s so hard to get to them all, right?! I am planning on keeping track of past heights. I’m thinking of either making little flags (to go with the race car theme) with the date and height on it to attach or just keep track in their baby books. We’ll see how creative I’m feeling, lol! Hope you have a wonderful week!
~Abby =)
This is so fun! I saw where someone did this one a wall, but I’m with you that’s a big commitment. I love the idea of kids being able to move the cars around. Thanks for sharing, so adorable!
Amy @ https://www.delineateyourdwelling.com
Thank you, Amy! They are definitely having a good time with it! Hope you have a great week!
~Abby =)
Super cute!! I love the magnetic cars to mark their growth. Love it!!
Thanks, Crystal! They’re having fun with it! Hope you have a great week, girl!
~Abby =)
Seriously genius!
Thanks, Val! Have a great week!
~Abby =)
it’s adorable! 🙂 I really like it very much Abby! it’s so fun! 🙂 the addition of the little cars is great!
Thank you, Ingrid! It was fun to make for the C’s! Hope you and little Nate are doing well! Have a wonderful week!
~Abby =)
Such a cute idea Abby!! I love it – Your boys must love it – I bet you are just the coolest mom.
Lol! I don’t know if they would say I am cool, but they do like their new growth chart! (Mom is never cool to her own kids, right? Haha) Thanks so much, Krista! I hope you’re having a great week!
~Abby =)
Where was this when my son was growing up??? I will pass this onto a new grandmother of mine who will truly put this to good use…
I linked over from the Fun In Functional Link Party where I am participating too with Ghost Shaped Card and Free Cut file and would love it if you’d stop by.
Hugs, Antonella 🙂
Thank you, Antonella! It was fun to make for them! I just love your cute ghost card. Thanks so much for sharing!
~Abby =)
This is an amazing idea, I think this would be an adorable DIY project for my nephew, thanks for sharing!
cantbuymelovvve.blogspot.com
Thanks so much, Angi! I bet your nephew would love it! Thank you for stopping by!
~Abby =)
This is just too awesome for words!!! I need one for my son!!
Aw, thank you Adelina! You are so sweet! It was definitely a hit with my little guys! Hope you’re having a wonderful Monday!
~Abby =)
It’s so funny how I’m at blog hops and always end up clicking on your posts! I must really love your content! Sometime soon we’re going to put my son in a big boy race car bed and I can’t wait to use that as an excuse to re-decorate his bedroom. This race car growth chart will be the perfect addition to his room!
Would you mind to link this up to my blog hop? I would love to see this there! Thanks!
Thank you so much, Carrie! You are the sweetest! I linked up to your hop… great party! Hope you’re having a wonderful Monday!
~Abby =)
This chart is so stinkn’ cute, Abby! You did such an awesome job. I’m sure your boys love playing with the cars. You come up with the best projects!
Thanks so much for sharing at the Frugal Crafty Home Blog Hop!
Katie
Thank YOU so much for hosting, Miss Katie! You are so sweet! I’m so glad you stopped by!
~Abby =)
My son would go crazy over this… such a cool creative idea!
Thank you, Elyse! My boys are definitely having a lot of fun with it! Thanks so much for stopping by my blog! Have a wonderful day!
~Abby =)
This is super cute!
Thank you so much, Miss Diana! Hope you’re having a wonderful week!
~Abby =)
Abby!!! This is awesome! I love the racecars – so clever and so cute!
Thank you, Chelsea! It was fun to put together for the Cs! Hope you’re having a wonderful weekend!
~Abby =)
How clever are you, Abby?! So cute! My boys would love this as well…too bad their Mama doesn’t have your level of patience for all of that meticulous taping off… 😉 Great job!
Lol. That’s why I recruit hubby for all of my taping projects. It always much faster when he helps! 😉 Hope you’re having a wonderful weekend, Samantha!
~Abby =)
Awesome idea!!! Now, to come up with a girly one for my Sweetie…
visiting from Let’s Get Social Sunday! Added you to b’lovin, fb, and g+!
Thank you, Sarah! I am definitely outnumbered by the boys over here, so mostly boy stuff it is, lol! Hope you’re having a wonderful week! Thanks for stopping by!
~Abby =)
So clever! I’m featuring it on Babycenter tomorrow! blogs.babycenter.com
Hi Abby
Love your blog and i will so do this on the weekend for my little one, Archer! Thanks for sharing. I thought I let you know I shared your post (including credentials) on my Facebook page ‘ The Little Tractor Boy’, check it out if you like 🙂 https://www.facebook.com/pages/The-Little-Tractor-Boy/562590533884021?ref=settings