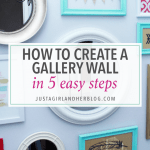
How to Create a Gallery Wall in 5 Easy Steps
Use these 5 simple steps to create an easy gallery wall that is beautiful and totally transforms your old space!
Recently I shared our stairwell and small hallway transformation. It went from dark and drab to light and bright! Part of that transformation was a new gallery wall in the main part of the stairwell, and I wanted to share the simple way we put it together.
I almost titled this post “Why Decorating Is Hard for Me and Why I Love It Anyway.” I think it’s easy to look around at blogs or Pinterest and think, “Everything just comes so naturally to all of these people. Why can’t I be like that?”
And while I’m sure there are plenty of talented people out there in blogland who can look at a space and immediately envision the perfect way to decorate it, I am not one of them. I often have to physically try things in a space to figure out if they work or not (the people at the returns counter know me by name 😉 ).
I go through lots of trial and error before I land on something I like, and even then I often end up making changes down the road. It’s a long (and sometimes painful– mostly for Donnie 🙂 ) process.
The more work I do on our house, though, the more I find myself going through the same steps over and over and the easier it becomes, so I thought I’d share my little process with you in case you’re like me and sometimes don’t know what in the world to do with a blank space. Here it goes…
How to Design and Create an Easy Gallery Wall
1. Search for inspiration.
Why yes, I am a big huge nerd at heart, so for that reason, I kind of approached my gallery wall the same way I would approach a test– I studied. I scoured Pinterest and Google image search and the #gallerywalls hashtag on Instagram.
While I did this, I made note of the things I was drawn to in the gallery walls I liked. Many of the ones I was drawn to, for example, mixed different types of frames and shapes and media– round and square and rectangle and wide frames and narrow frames and large pieces and small pieces and mirrors and photographs and art and objects– rather than all of the same type of frame with the same type of media. (Though I have seen many of those that are gorgeous as well.)
I liked when there was a consistent color scheme, and I really liked when that color scheme included metallics. Paying attention to what was inside the frames helped to give me ideas fo things I might like to include in my own gallery, too. My “likes” are certainly not the “right answers” if we’re equating this to test taking, but as you start to look at gallery wall after gallery wall, I think you’ll find yourself being drawn to certain types, whether they’re the same type as mine or not.
Follow Abby @ Just a Girl and Her Blog’s board Gallery Walls
2. Shop for gallery wall pieces.
This search usually starts at home. I have a box of frames that I’m not currently using, so I’ll go through and pull out anything I think might work. Sometimes I have to paint or otherwise alter to the frame. Sometimes I just leave it alone.
Once I’ve exhausted all of the options I have in my house, I go in search of pieces to fill in the gaps. I’ve listed the source for each of the items I ended up with below.

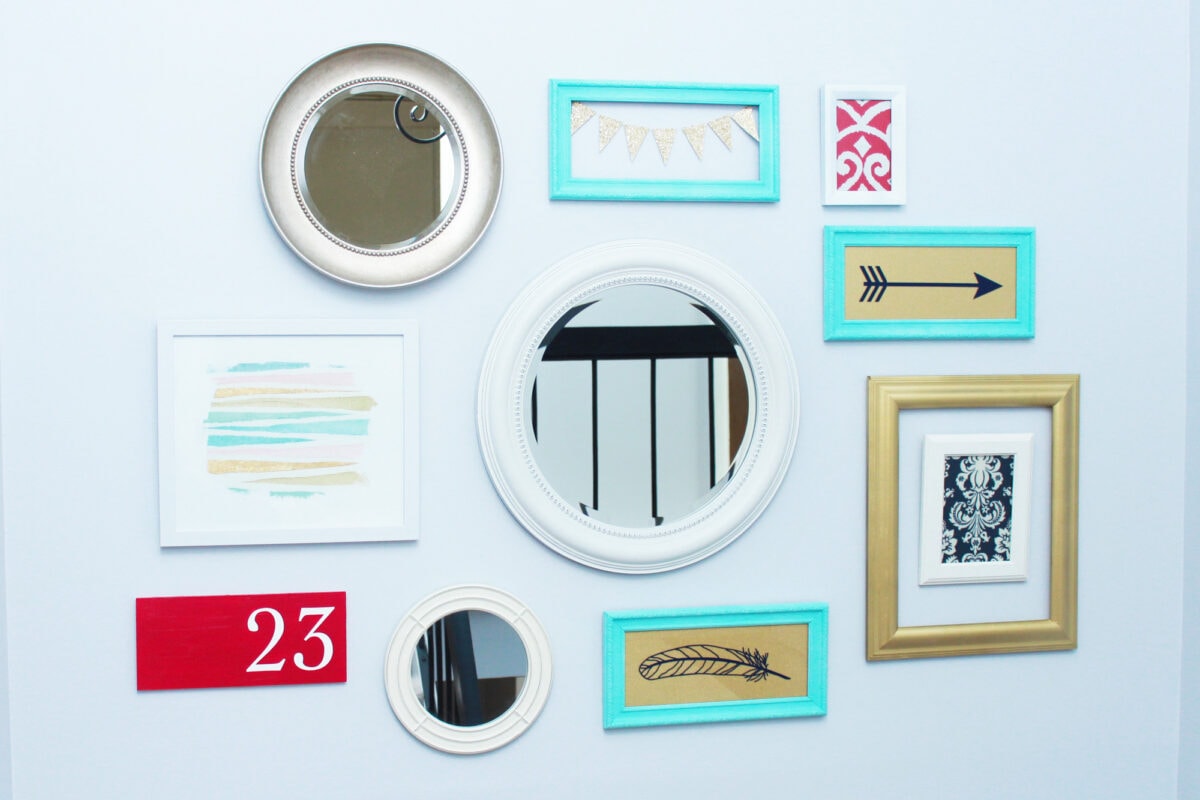
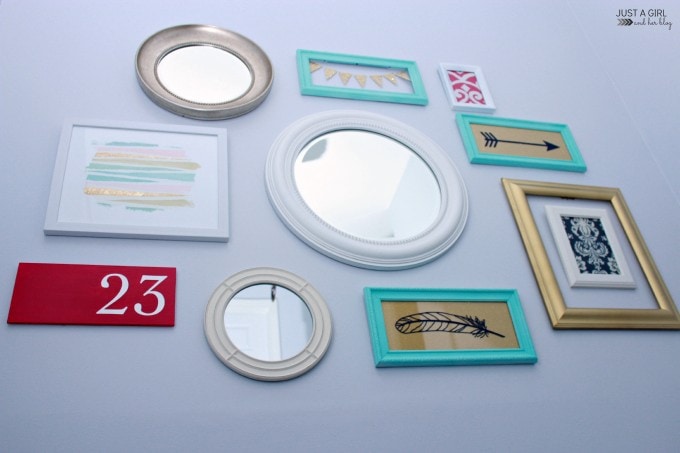
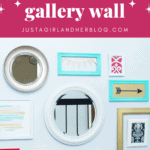
where i found my decor
- 1- Hobby Lobby
- 2- Frame I owned, painted and added scrapbook paper banner.
- 3- Frame I owned, painted and added swatch of fabric.
- 4- Hobby Lobby
- 5- Hobby Lobby
- 6- Frame I owned, painted and added scrapbook paper and vinyl arrow cut with my Silhouette machine
- 7- $2 piece of wood from Michael’s, painted, number added using stencil made with my Silhouette
- 8- Target
- 9- Frame I owned, painted and added scrapbook paper and vinyl feather cut with my Silhouette
- 10- IKEA frame I already owned, added swatch of fabric
- 11- Frame from thrift store, painted gold
When I’m gathering pieces, I’m looking to keep a consistent color scheme. The piece of art (#4 above) served as my lead piece for this grouping, and all of the other pieces were chosen/painted to match it.
(I opted to use the darker pink rather than lighter pink in some of the accents because I thought my boys might throw a hissy fit if I made light pink a staple in our house. So far, Donnie and Connor have both referred to the dark pink as red. Shhh… don’t tell them it’s actually pink!)
I was also looking for a mix of large and small frames in different shapes and sizes, as I mentioned previously.
3. Set up a mock gallery.
Once I have gathered a bunch of pieces I love, it’s time to do the arranging. I lay everything out on the floor in my office and move things around over and over until I like it.
Both with the mirror gallery wall in my living room and this one, I gravitated toward using a large piece in the middle as my focal point and then using smaller pieces toward the edges of the grouping. Just to show that things get rearranged and changed over and over, this was the original setup I had decided upon:
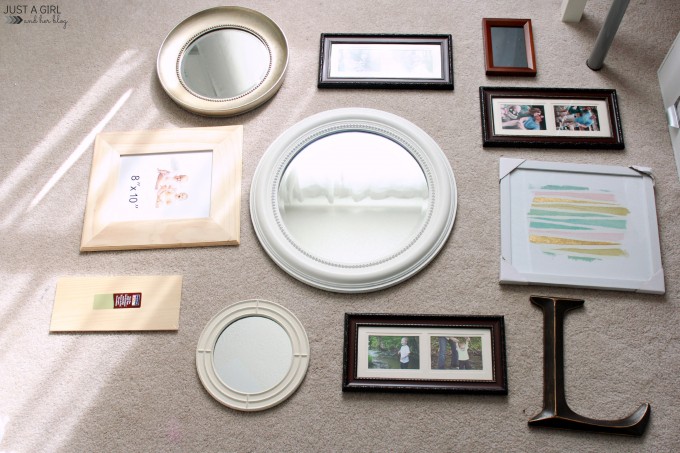
As you can see, it looks a little different. I ended up not using the “L” or the larger wooden frame on the left. The art changed sides and I ended up bringing in the gold thrift store frame I already had. That’s because before I set it in stone…
4. Ask for feedback.
I always like to put it in front of another set of eyes. Other people might see something I have missed or have ideas I may not have thought of. Donnie actually has a pretty good eye for things like this, so I always run it past him.
This time I also texted back and forth about it with my friend Chelsea from Making Home Base (who also recently did an adorable gallery wall in her daughter’s room— be sure to check it out!), and she gave me some great suggestions too.
After I was set on my final arrangement, it was finally time to…
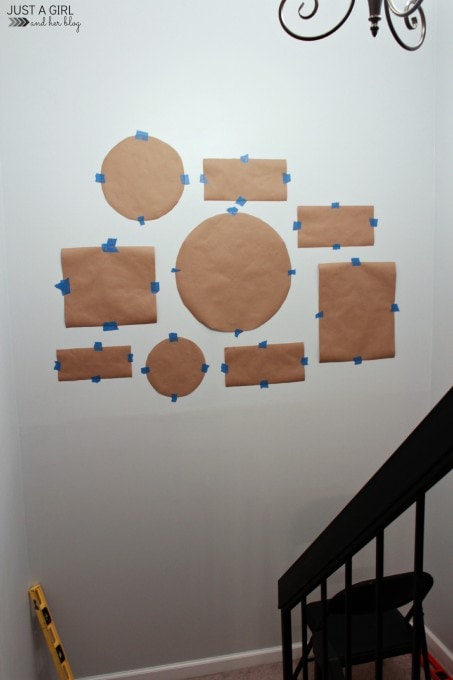
5. Hang the gallery wall!
Donnie was in charge of the actual hanging of the pieces, but I did the all-important job of supervising. 🙂 Honestly, we usually just wing it, but this time we traced all the pieces on paper and arranged them on the wall first to make sure they looked just right.
There were a lot less holes in the wall using this method.
Tip for hanging
When you are tracing, make sure you mark where the frame’s holes/hooks are on your paper template so you can just tap your nails into the template, pull the template away, and they’re in the perfect spot for hanging the pieces. It’s kind of like magic.
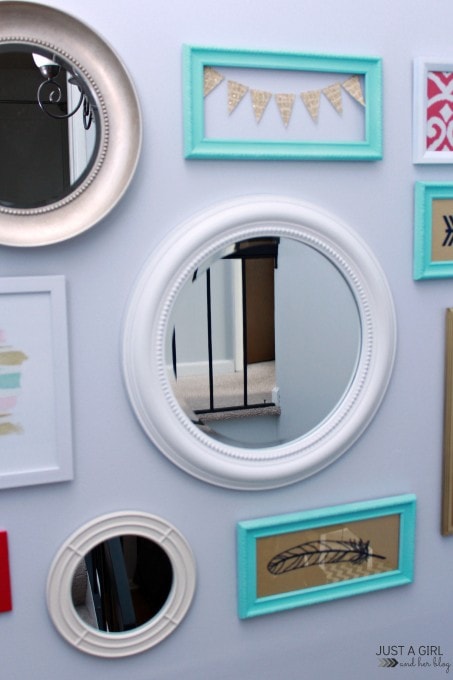
When all the pieces were hung in place, we finally had…
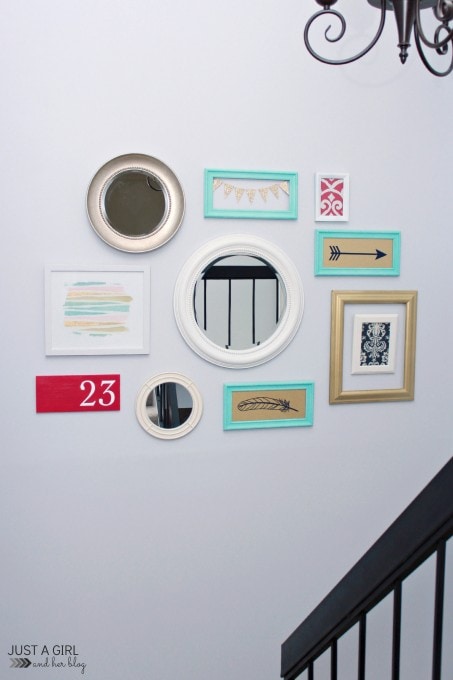
our beautiful gallery wall!
And it’s definitely an improvement over what we had before…
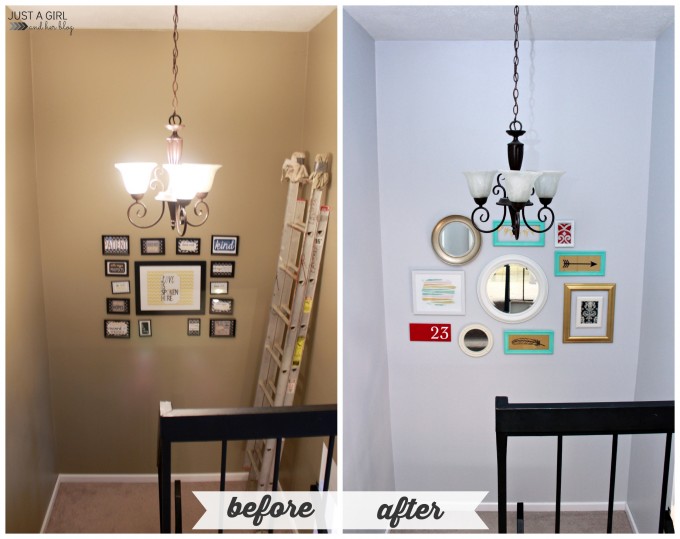
Sigh… so much better! Yes, decorating can sometimes seem overwhelming, but it can also be so much fun! Following the steps above has definitely helped me to enjoy the process and make our home a little more “us” in the process.
Easy Gallery Walls: Frequently Asked Questions
Want to save this post to revisit later? Be sure to pin the image below so you can find it easily!
What are your favorite tips for hanging gallery walls?
Thanks so much for following along! Have a wonderful day!

Thanks for all the tips, Abby! I tend to know what things I like, but arranging them together so they actually make sense and aren’t an assault on the eyes is not exactly my strength. 🙂 My perfectionist ways also complicate the process. The result is that things I love end up in a box somewhere because I can’t figure out how to display them, and my sad, lonely walls continue to stare back at me. I hadn’t thought of tracing things and then taping the paper shapes on the wall! Abby, you quite possibly just changed my life…and my apartment’s. 😉
Yes! I am such a perfectionist too! I had the hardest time wrapping my brain around anything that wasn’t 100% symmetrical. But when I realized things could be balanced without being symmetrical, a whole new world opened up to me, lol! Have fun decorating!
~Abby =)
Your email arrived a whole hour earlier today, Abby. Our clocks went back at the weekend and I don’t think yours do until next weekend? For one week only we are out of sync and have a 4 hour time difference!
Anyway, more to the point, that’s a lovely gallery wall! I like how you share your process and begin with lots of planning and research. I suppose you’re right and that the more often you put picture groupings together, the easier it will become. I love the different accent colours, shapes and sizes and how you’ve made them into the cohesive group. That’s a VERY stylish stairway!!
Emma xo
So funny! Yes, we haven’t changed yet! Thank you so much for your sweet words, friend! Hope you’re having a fabulous Monday!
~Abby =)
Love this idea. I have a blank wall in my foyer and this would be perfect. Thanks for laying out the whole process.
Thanks, Kristine! Have fun with your gallery wall!
~Abby =)
Love it!! All your studying paid off. I always do my “studies” before I do something too!!
Thank you, Michelle! I’m telling ya, it’s all about the studying! 😉
~Abby =)
I find that I too get so discouraged when I see other blog posts or Pinterest pictures of beautifully decorated spaces but I always have to remind myself that they started somewhere too and all of our talents and gifts are different. But I do love your wall and the pops of color. I’m also glad I’m not the only one who hangs paper up on the wall before hanging pictures. Our last wall art project my husband came home to newspaper cut-outs taped all over the wall and just shook his head before walking into the next room 🙂 He later admitted it was very helpful when he drilled the holes for me!
Oh girl, you are so right! The comparison game is such a dangerous thing, and it’s SO easy to fall into! And don’t you just love it when husbands admit we’re right?! 😉 Hope you’re having a wonderful night, Victoria!
~Abby =)
Came out perfectly!! Love love love!
Thanks, friend! <3 It was all of that fabulous texting advice! 🙂
~Abby =)
I’m still in awe of how much brighter and bigger your space looks!! You did a great job on the gallery wall! I’m with you on the studying- I tend to obsess over something and stalk it before it actually happens in my home 🙂
Thanks for sharing all your tips!
Good to know that I’m not the only one who has to “study” before I do anything! 🙂 Whatever works, right?! Hope you’re having a wonderful day, friend!
~Abby =)
I really enjoy your blog. It is very informative and I’m glad I found it. I’m in the process of sprucing up those dreaded baseboards.
Thank you so much, Anne! Best of luck with those baseboards! 🙂
~Abby =)
I love it!! Turned out perfectly. First, the wall color is lovely! And second, I really love the pieces you chose AND the colors!! I also lay them all out on the floor and change them around 2,596 times. 🙂 I’m a visual person, I have to see it all laid out!
You are the sweetest, Miss Amanda! So glad I’m not the only one that does the floor method a million times before deciding! 🙂 Have a great week!
~Abby =)
You have inspired me!! Thanks for sharing all of your tips. I have made it my mission to create me own gallery wall now!!
Woo hoo! You can do it! Make sure to send me a picture when it’s done so I can check it out! 🙂 Have a wonderful week!
~Abby =)
This is a great process tutorial Abby! I just always wing it with my gallery walls…sometimes I lay it out on the floor first but I have never bothered with the step of the paper on the wall. I’m too impatient. But for someone who doesn’t want 79 extra holes in the wall I will say that your method is FAR superior:) lol IT looks amazing!!
Lol! Thanks, friend! We usually do the “79 extra holes in the wall” method too, but decided to give this a shot this time. It worked! 🙂 Hope you’re having a wonderful weekend!
~Abby =)
This is absolutely adorable! Love the mix of color and the pop of red. The after picture is much more eye appealing than the before. Thanks for the tip on tracing on paper then using that to put the nail in the wall. Will save the wall for sure. Pinning! Thanks again.
Thanks so much, Heather! Yes, the paper tracing method is super helpful! Hope you’re having a wonderful weekend!
~Abby =)
Wow! What a great facelift! It was cute before but now it’s just… wow! I love the blue frame on top with the scrapbook banner. Is there a tutorial for that somewhere?
Thanks so much, Sydney! I literally just cut triangles out of scrapbook paper, strung them on thread, and taped it to the back of the frame! Easy peasy! 🙂 Hope you’re having a wonderful weekend!
~Abby =)
I learned the value of cutting out the butcher paper the hard way. After filling a gazillion nail holes and painting my stairwell I realized simplicity reigned over quantity. Now we have a very fun and inviting area. Great tips!
-Jillian
Lol! That sounds like our previous gallery wall experience! Yours sounds beautiful! Hope you’re having a wonderful weekend, Jillian!
~Abby =)
Great method! I went through the same process when I did my gallery wall a few months ago, and it was so much easier than I thought. Love this post!
Thanks, Lauren! Gotta love those gallery walls! Have a great weekend!
~Abby =)
Great tips! Love your gallery wall. I have a large wall in my foyer that I’m not sure what to do and I’m leaning towards a gallery wall. Thanks for sharing. I will def be using this in the future.
Thanks so much, Sharon! Best of luck with your gallery wall!
~Abby =)
Your gallery wall and tutorial, how you achieved it are wonderful. I was looking at all the gallery walls Elegance and Enchantment featured and realize even more how personal Gallery walls can be. Can be tweeked for season or holiday, happenings in a life. I love that we can do whatever we want to keep it meaning something to us.
I created a gallery wall for first time after we painted our living room this past summer. Our colors changed, what I had on walls changed and all due to how the room felt after painting. What a free and happy feeling. The room was dark and depressing before we painted, colors and feeling of room were yuck, to me anyway. The couch we had to me was like a big black hole. I got another couch at Habitat in a style I much prefer, what a difference it made in room.
I change items on gallery wall as seasons change, I get very bored with same thing month after month so this is good way to keep me feeling satisfied (and busy making new art for gallery wall.
If I haven’t commented on some of your posts it’s cause this naughty machine and our provider are having difficulties. I’ve called them to no avail but will keep trying. Hope to get new pc soon. Always enjoy your blog and posts immensely. Happy Hallween
Hope your boys are flourishing, happy and healthy, growing like little weeds?
Ooh I love the idea of switching things out with the seasons! I bet your gallery wall is lovely! Yes, the boys are growing way too fast as usual! I keep telling them to stop, but they just don’t listen. 😉 Hope you’re having a wonderful weekend, JaneEllen!
~Abby =)
Last week I bought a stylish sofa in honey mustard colour. And I’m thinking of a gallery wall to create above it. But I’m still wondering about the colours… First I choose a black and white combination of pictures and frames and I tried it, but it looks too simple… I need an accent!!! Can you give me some advice? The walls are pained in light eggshell colour.
I always love teal as an accent color. Though a plum-y purple would be gorgeous with your mustard couch! Best of luck with your gallery wall, Zara!
~Abby =)
Wow! I love your approach to the whole process. I think I’m actually inspired to do a gallery wall myself now. I too have a box of unused frames, and scrapbook paper, and fabric, and paint. I can totally do this. Thanks for the inspiration!
This is great! I have been wanting to put up a gallery wall and this is a great way to go about it! I’ve also been looking around your blog and you are very inspiring! I know you hear that a lot, but it’s true! That’s not just for crafts, but blogging as well. I just started my blog so reading your posts energizes me to keep going to see what happens. Thank you for your wisdom and inspiration! I will visit often 🙂
This is so great. Thanks for the great idea of arranging it on the floor. Such a simple and practical idea that completely escaped me! I am excited.
I’m working with a client on this concept right now, I can’t wait for the final outcome. Yours look beautiful!
I find gallery walls tobe a challenge. Starting with the things you love is a great tip. I find it always inspires
Hi Abby,
I enjoyed your post on Gallery Wall…I like the colors you chose for your gallery wall… Made such a difference in the before pictures and the after pictures,,, very cleaver. I to love to decorate and create have for 40 years… I am a mother of 1 grown Son and 1 Grown Daughter…6 beautiful grandchildren and 2 beautiful great- grandchildren. I love to create. Blogging is 1 year new to me… I do enjoying it and writing… Yo have a wonderful blog… and Congrats to you on your success. Maybe your could give me some pointers on my blog…Nice to meet you…Linda
Thanks so much, Linda! Glad it was helpful for you! <3
~Abby =)
Great post Abby! I love the before and after picture it really does show a massive difference, its stunning what you have done! The use of the circular mirrors against the rectangular pictures work so well!